


Hi there Unity Peeps!! This is Kelly Landers, the Guest Designer for Unity Stamps this month. Thanks so much for all your sweet comments on my blog when Angela has sent you over there! I really appreciate it and have been having so much fun working with her uber talented DT members and of course her fabulous stamps! Unity Rocks!!
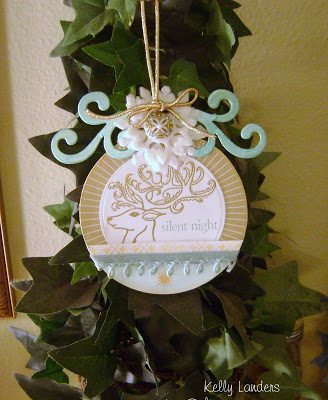
I am here today to share with you a tutorial on how I made this ornament…

I made this ornament for a Dirty Dozen/ Dirty Dozen Alumni Challenge at SCS this month. You can see my blog post about it HERE.
The one that we make today will be just slightly different, but you will see how it can be changed up to suit your needs or to be able to work with the supplies that you have on hand.
Step 1 Gather your supplies. ( In addition to what you see pictured below, you will also need a pencil, scissors, file or sandpaper, heat gun, Cuttlebug (optional), red tape, paintbrush and Cropadile or hole punch.)


Step 8 Apply adhesive to the smaller circle and center it on top of the chipboard base.


Step 13 Allow the front to dry and repeat the process on the reverse side.

Step 14 Using a Cropadile or a hole punch tool, apply a hole in the top of the chipboard flourish.


So there you have it! It seems like a lot of steps, but it goes together quickly. I hope you will try to make an ornament similar to this one and if you do we would love to see it, so be sure to upload it to the SCS Gallery and put Unity in for the keyword.
Have a wonderful day and thanks if you stuck it out all the way to the end!!
Kelly Landers for


