Watercolor with distress markers is the focus for today’s Watercolor Wednesday post.

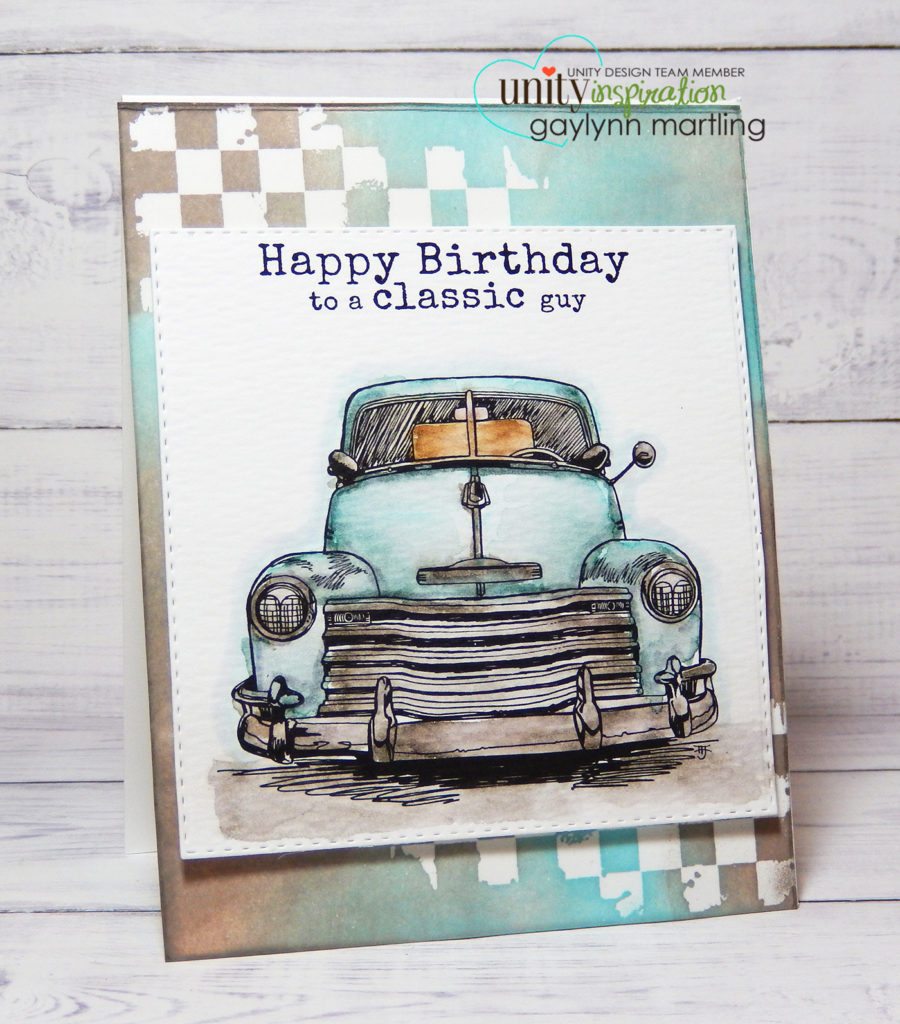
Hello, it’s Gaylynn. Welcome to the first day of the Watercolor Wednesday series for the Unity Stamp Company blog, showcasing watercolor with distress markers and stamping. This is a masculine themed truck card. I will show you how to use these markers along with a water brush, watercolor paper and inks with stamping.
For this blog series, I will be here each Wednesday with a new project and tutorial for you, showing different ways to use watercolor with stamping. I welcome your comments and questions over on the Unity Facebook page. Furthermore, if you make something using my technique, it would be great if you can also share your project on the Unity Show and Tell facebook group page. Request to join there. It is filled with inspiration and lots of beautiful souls just waiting to share the love.
 In addition to a written tutorial, for this technique, I made a video tutorial showing the watercolor process. I used the Unity stamp kit Slowly Turning Classic for the truck and sentiment.
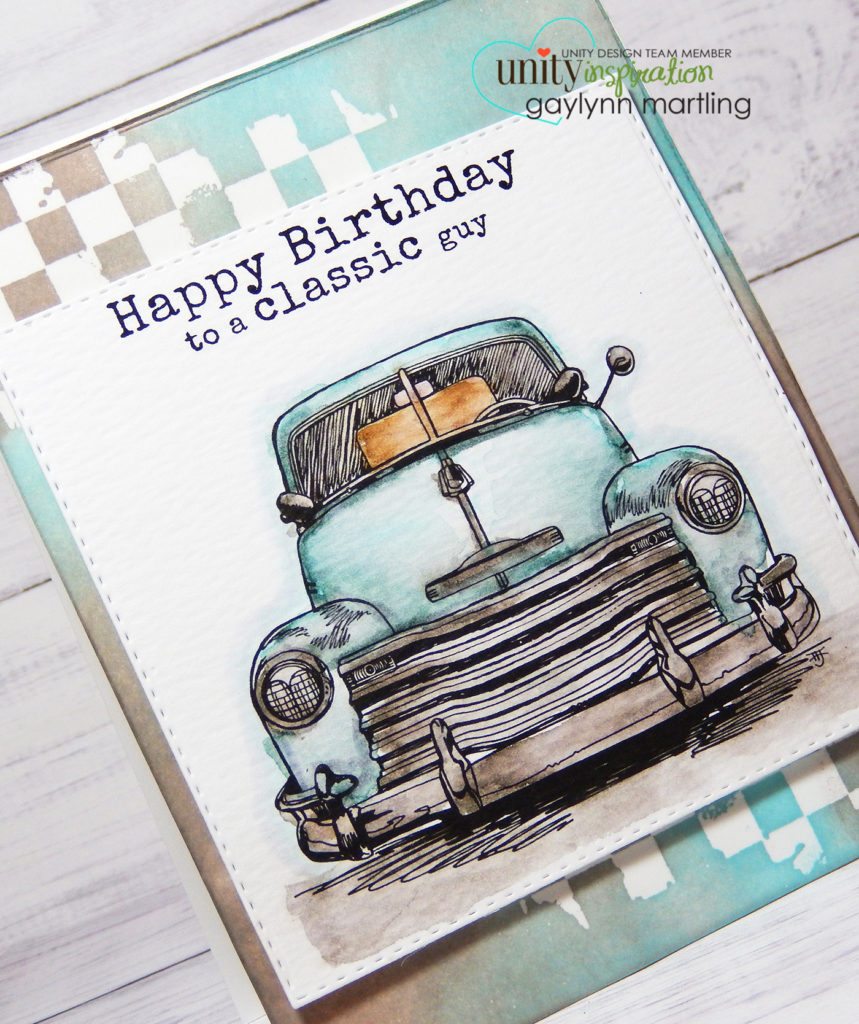
In addition to the watercolor tutorial, I am also including a second video. It will shows how I created the background panel shown in this vintage truck card. I used the Unity stamp kit called Vibes for the background.
Watercolor With Distress Markers Tutorial
By Gaylynn Martling for Unity’s Watercolor Wednesday
(See also the video tutorial for this project.)
There are instructions along the way for each video. But, for the watercolor part, I am outlining the steps here as well.
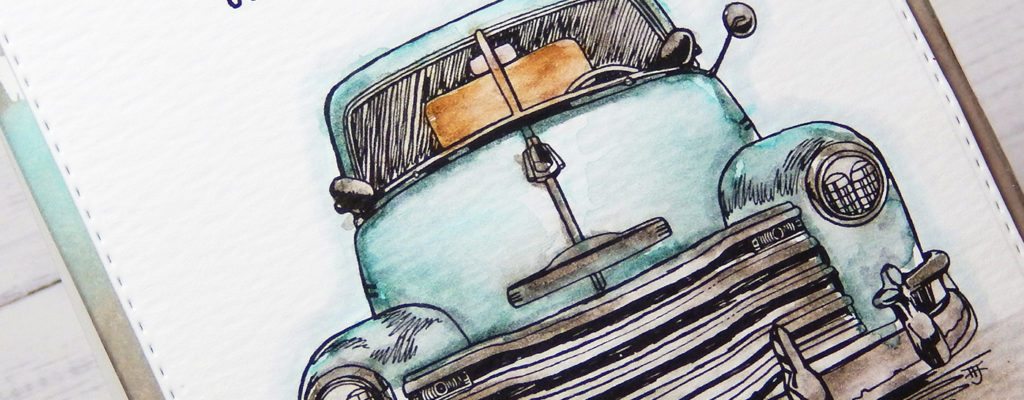
Stamp with waterproof ink onto watercolor paper, smooth side. I like Ranger Archival ink.
I used Ranger Tim Holtz distress markers and a water brush for watercolor. Tumbled Glass, Vintage Photo, Iced Spruce Weathered Wood and Pumice Stone.
Start by adding a color to the edges and folds. Then using a water brush or a wet brush, move the color out. Heat set between colors and layers.
Replace water if it gets color saturated. I sometimes like to add water drops on a mat and then pick up more water as needed.
If you want darker or brighter color, add a second color layer, drying in between.
Repeat the process with each color. A dab of marker color goes a long way when blended with water.
I added a darker color layer for the car edges and shadows.
I added an outline shadow for dimension. This can be done with watercolor or markers. I used Copics C1, BG0000 and 0.
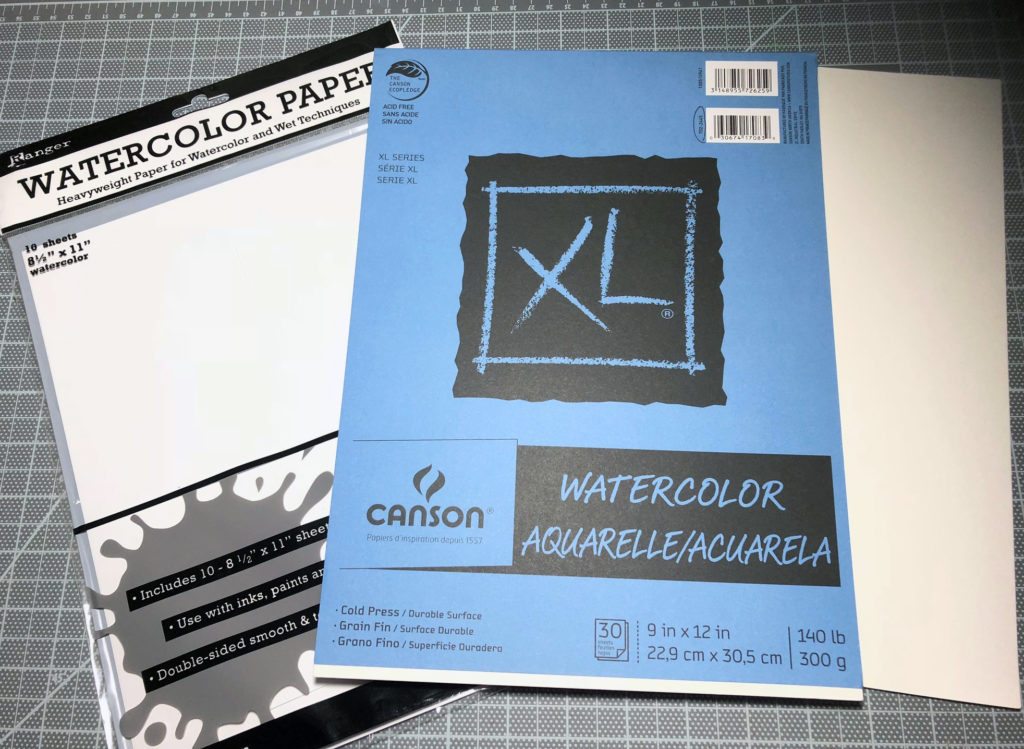 Paper for Watercolor Projects
Furthermore, for watercoloring, I use either Ranger watercolor paper or Canson cold press watercolor paper. Each of these have a smooth side and a texture side. For stamping, I recommend the smooth side. They each watercolor nicely. The paper color is a little different. The Canson pack that I have has more of an ivory look to the sheets, whereas the Ranger is bright white. I use each for different types of projects. I included a picture of the ones I have on hand.
Here is another look at the finished card.
Finally, catch each Wednesday for more tips on watercolor with stamping.
Here are other recent watercolor articles:
Watercolor with Sakura Koi and Heat Embossing.
Watercolor with Brusho Crystal Colors & Emboss Resist
Thank you for visiting. Have a great day.