


Hello Friends…
It is Sentiment Saturday time. I’m excited to be sharing a project using some of my favorite Unity Stamp Company sentiment set.
Featured Stamp Set


The Video
I’ve created a quick video tutorial on how this card was made. You can watch it below or on YouTube.
The Project
The Details
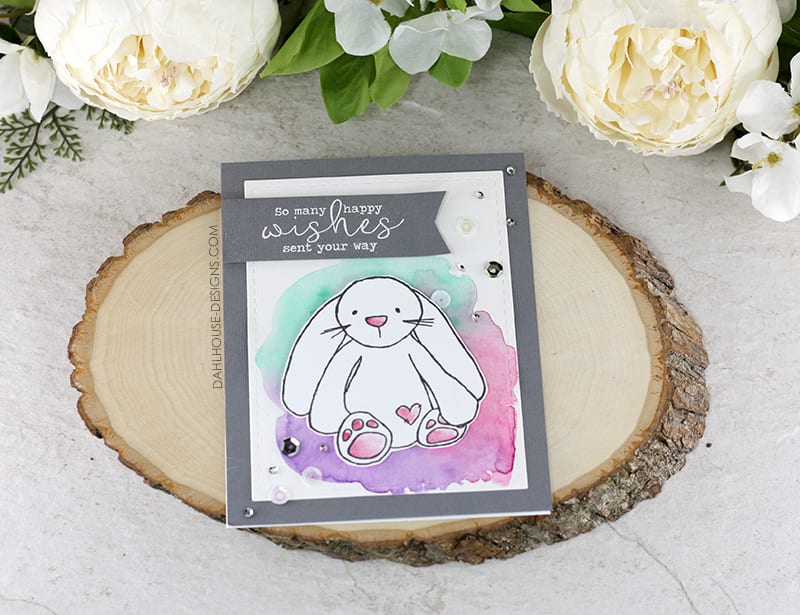
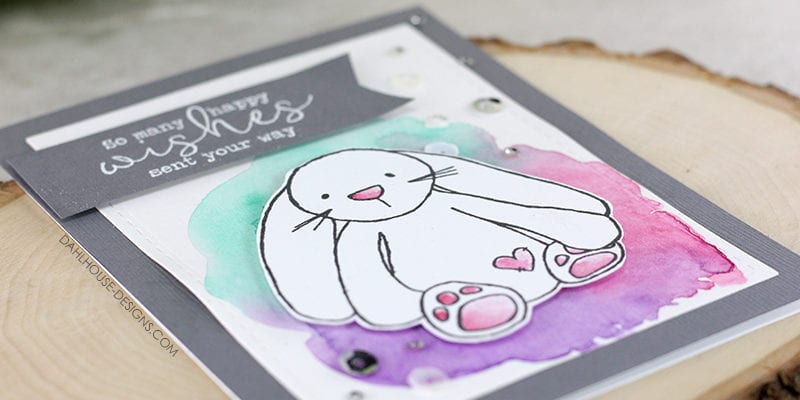
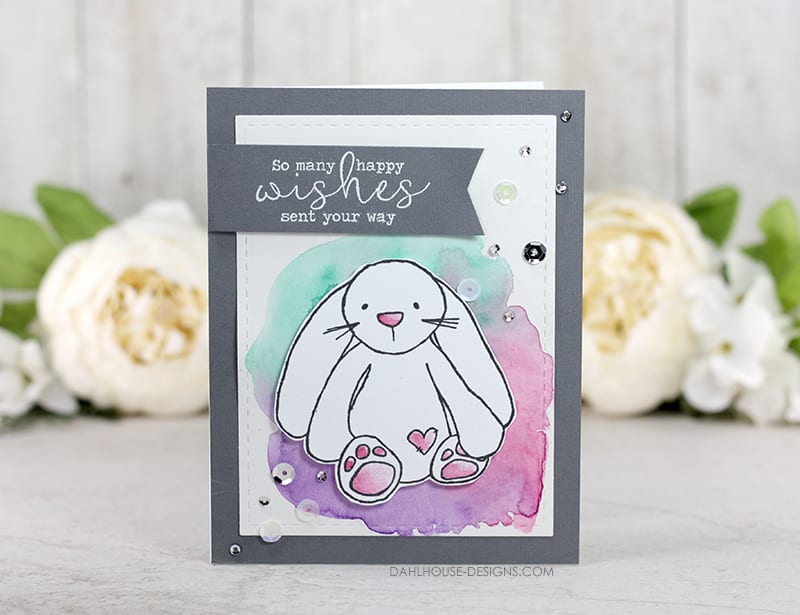
I love an easy watercolor background and this couldn’t be easier. All you need are three pastel colors with some water and watercolor paper. Boom. A beautiful background.
I’m using this adorable bunny from Bunny Keep You Forever. He’s one of my faves. Just reminds me of a cuddly stuffed bunny I used to have. He’s great for lots of occasions, but I matched him with a sentiment from Every Single Day for a birthday card. I guess it could be for any happy occasion you want to wish someone good things too.
The Steps
Here are the steps to recreate this card:
- Start with a standard size A2 card (4.25″ x 5.5″) card covered in grey cardstock.
- Die cut a piece of watercolor paper with a stitched rectangle die. Apply some clean water in a circular shape big enough to be seen behind the bunny. Add the three watercolors to the area with water. Tap and dab the color on until you like the look. You can always add more water if the colors are not moving as much as you’d like. Set aside to dry completely.
- Stamp the bunny onto white cardstock and fussy cut the image out. Use pink watercolor paint to color in the nose, feet, and heart. Since we are only using a little bit of water, the cardstock can handle this little bit of watercolor. Let it dry.
- Once the background is dry, glue to the front of the card. Pop the bunny up over the watercolor with some foam adhesive.
- Stamp the sentiment onto a strip of the same grey cardstock as the background with Versamark ink and emboss with white embossing powder. Notch out the end to create a banner and pop up on the front of the card with foam adhesive.
- Glue on some sequins with a strong glue like Glossy Accents and add a bit of sparkle to the bunny with a Wink of Stella glitter pen.
- Admire your beautiful card. Just look at that watercolor background. So cool right? You’re gonna want to do that again.
Thanks for joining me today. I hope you are inspired by today’s project. If you create something, I’d love to see. Join us in the Unity Show & Tell Facebook group to share your card and tag me.

Supplies
Affiliate Links are used when available at no additional cost to you.


