


Welcome
Welcome back to your Quick Card station, where I show that you can make a wow card quickly.
The Project
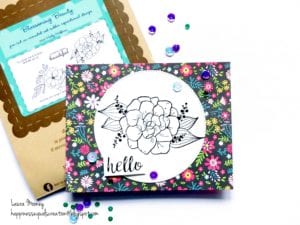
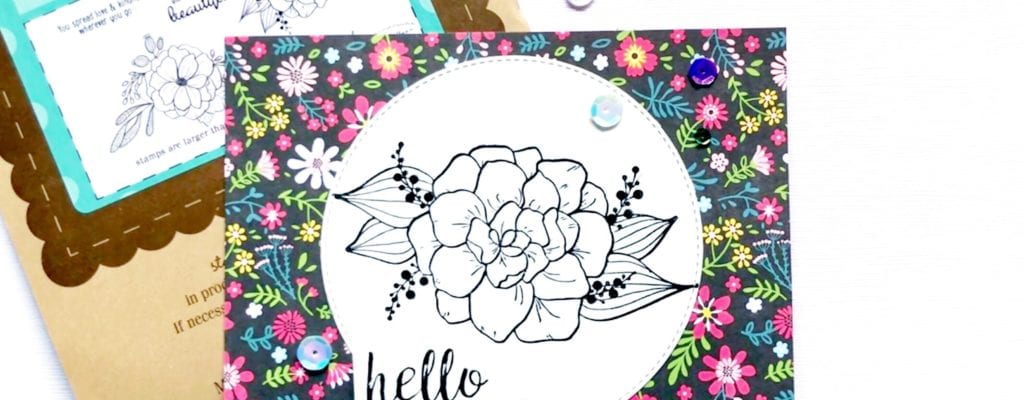
Now if you’re anything like me, you have a large stash of pretty patterned paper. Some of the designs are quite intricate and rather busy, so adding a fussy painted stamped image can clash with the design, rather than compliment it. So today I will show you that an uncolored image can still make an impact with the right pattern background that took me only 9:39 to make.
Why It Works
The paper I have chosen is a small, tight, busy print. If I had chosen a detailed image and colored in all that detail, the image and the paper would be competing for your brain’s attention and you’d miss the overall effect. By leaving my “simple” image uncolored, I have provided a resting place for the eye. It allows you to take in all the elements at once. It would not have worked as well with a simpler pattern either. You must find this balance.
The Steps
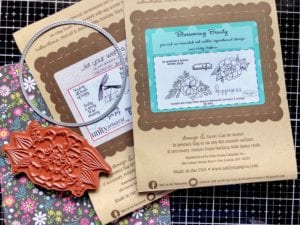
I found this pretty floral paper in one of my 6×6 pads. Isn’t it cute? The flower is from Blossoming Beauty and the sentiment hails from Let Your Wishes Fly. Firstly, I cut the patterned paper to an A2 card size. Then I cut out my circle spot and stamped the flower. Afterwards, I adhered it onto my pretty paper.
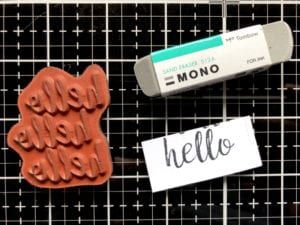
I only wanted one of these three “hello” sentiments, so I stamped the whole image, then trimmed off the ones that I didn’t need. A little foam tape, to pop it up, was all it needed.
Quick tip: as you can see, there are little bits of the “hello” from above, because they are arranged quite closely together. I use a sand eraser to whisk away these unwanted bits of ink. It is so handy for erasing smudges, mistakes, getting overzealous with the ink colored fingers and leaving ink prints. Let’s just say that I use this little guy a lot.
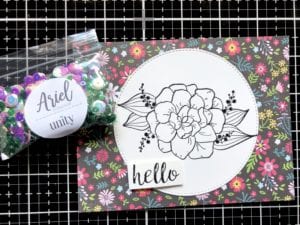
Finally, I added some of the Ariel sequin mix to add dimension. You could add some sparkle with glitter glue or Wink of Stella too, but I left it plain so you could see that it doesn’t really need anything.
The Challenge
This week I challenge you to create a project where your paper is the star. Be sure to post in the Unity Show & Tell FB group.
Stamp on!
