Hi, it’s Gaylynn here with another installment of my Watercolor Wednesday series.
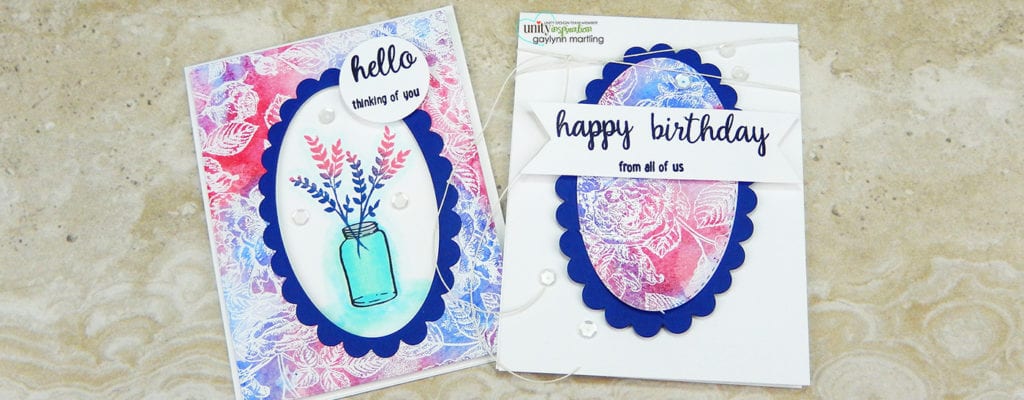
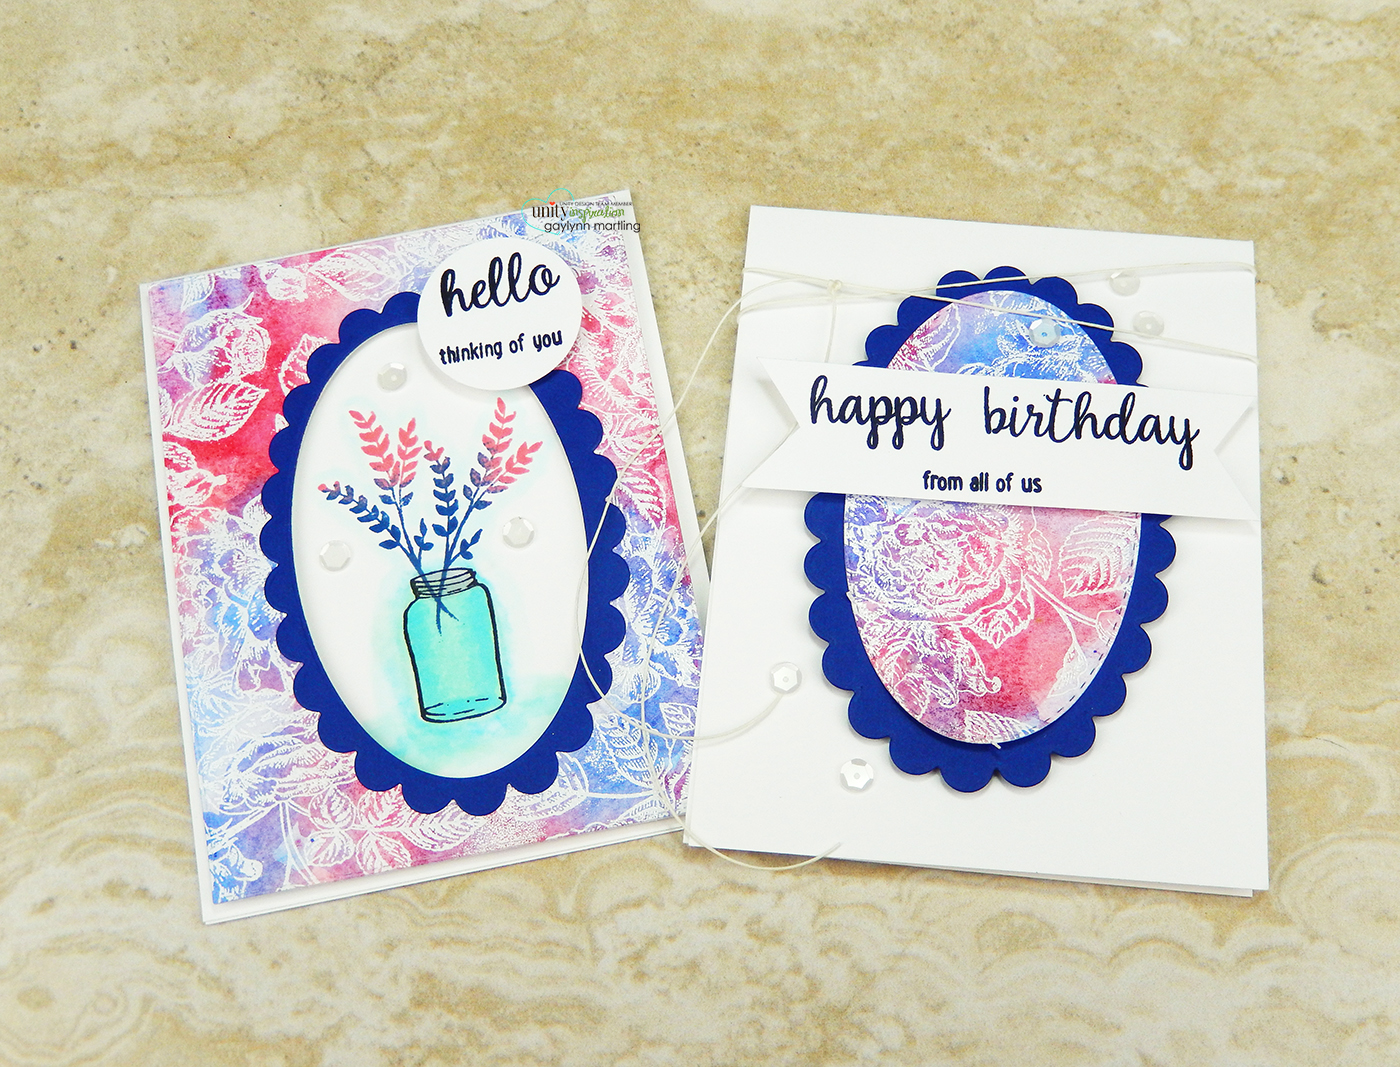
Today, I am sharing a quick way to make two cards with one watercolor background panel.

This is a quick way to get two for one cards with pretty watercolor background detail.
To make these cards, I first added watercolor layers to one 5×7 sheet of watercolor paper. Then white heat embossing was applied over the dried watercolor layer. To make two cards, I die-cut a frame and an oval center. The negative was used for the second card. Adding the sentiments and the flower vase accented the cards further.
Sentiments:
Hello. Thinking of you.
Happy birthday from all of us.
Unity Stamp Co. products used:
Botanical Background
Jar Of Mixed Sentiments
*
*

Two Cards With One Watercolor Background
By Gaylynn Martling for Unity’s Watercolor Wednesday
(See also the video tutorial for this project.)
Begin by adding water and then watercolor onto watercolor paper. I alternated 2 premixed colors.
I mixed colors to get deep blue and coral shades. Then, I added color over the water sections on the paper.
Add water to new areas before adding the second color. Allow them to blend a little. Blot puddles.
Repeat if you want to. To soften the look, blot the whole panel with a sheet of paper towel. Allow to dry or heat set.
I added another layer of water and the two colors to repeat the process.
Stamp using VersaMark or watermark ink over the watercolor panel. Add white embossing powder. Heat set.
For watercolor, I used Sakura Koi along with a watercolor brush. I die-cut an oval center and also an outside frame.
Option: Trimming, cut files or punches can also be used to create a frame. Using the negative makes two watercolor cards.
Assemble the layers to finish.
Here is another look:

Finally, I made a quick video tutorial for this project.
To view my other watercolor projects on the Unity blog, see Watercolor Wednesday.
Catch me next Wednesday with a new project for Unity’s Watercolor Wednesday.
Thanks for visiting.