• Skip to primary navigation
  • Skip to main content
  • Skip to footer
facebookpintrestinstagramyoutube

Unity Blog

account
Menu
  • Sale
  • Shop Products
      • SHOP Supplies
        • ALL Supplies
        • Adhesives
        • Blending Tools
        • Ink
        • Card Bases
        • Embellishments
        • Embossing
        • Stamp Storage
        • Stamping Tools
        • Tags {Kraft & Manilla}
        • Clothing
      • SHOP Stamps
        • 2018 Newest Releases
        • Cuddlebugs
        • Itty Bitty Line
        • Sentiment Kits
        • ANGIEgirls
        • SHOP by THEME
        • SHOP by ARTIST
      • Gift Cards
    • Close
  • Memberships
    • Memberships
    • Kit of the Month
    • Layers of Life
    • S.M.A.K
    • Uniquely Unity
    • Close
  • Blog
    • Blog
    • Design Team
    • Artistas
    • Close
  • About
    • About
    • Terms & Conditions
    • Angel Policy
    • Shipping Policy
    • Contact Us
    • Close
  • Custom Stamps
DIY WATERCOLOR with MARKERS. How to make WATERCOLOR | Heat Emboss Resist

October 29, 2019 - by Crystal Thompson

DIY WATERCOLOR with MARKERS. How to make WATERCOLOR | Heat Emboss Resist

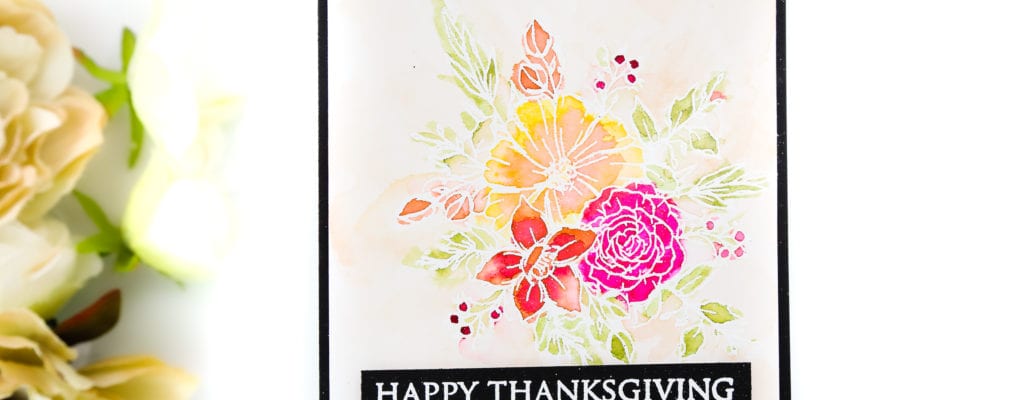
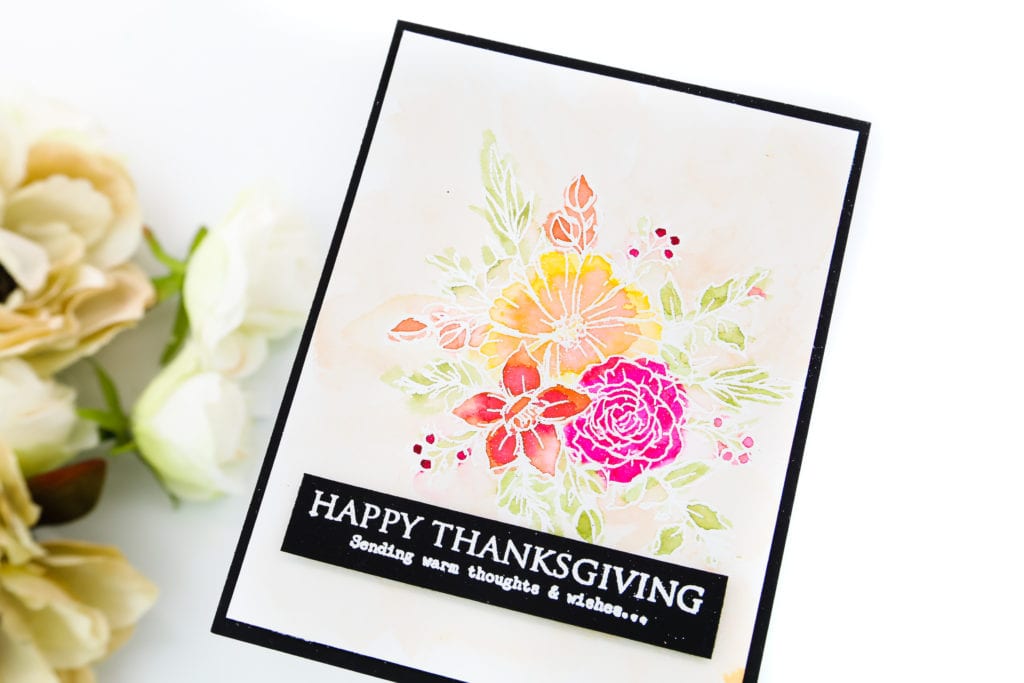
Hi! Today I am water coloring with markers, on a white heat embossed floral image, today’s tutorial will showing you how I used watercolor markers (zig clean color markers) and having an embossed resist outline of floral images.

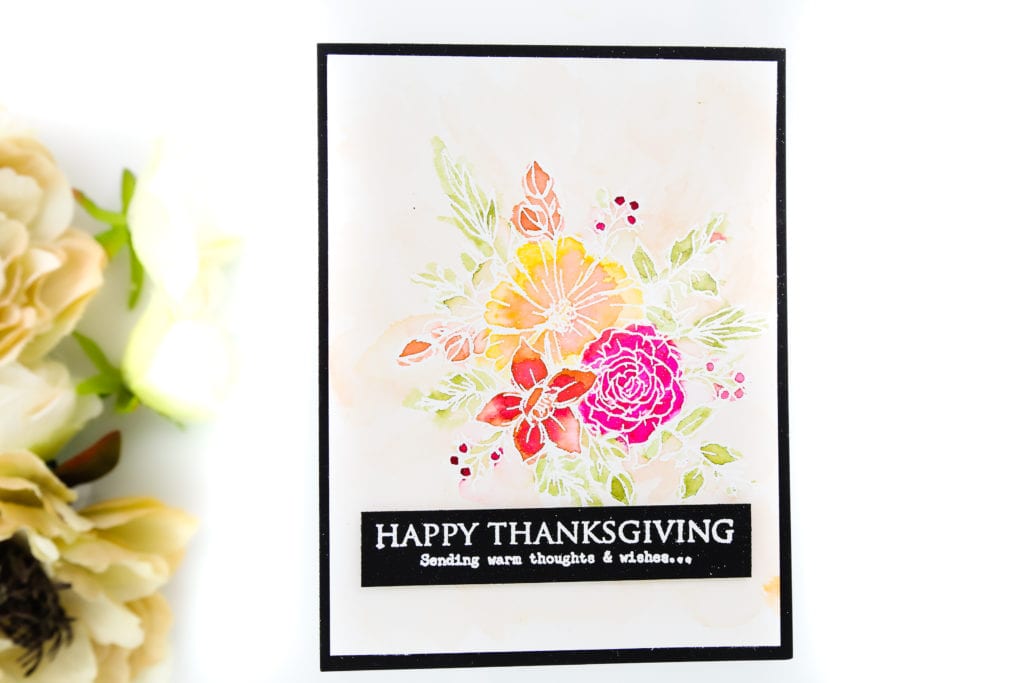
For this simple and easy watercolor project, you will need the Autumn Dream stamp set, watercolor cardstock, Zig Clean Color Markers, white embossing powder, and black cardstock.

To begin, we will trim the black cardstock to 5.50 and 4.25 inches, the white watercolor cardstock will be trimmed to 5.25 to 4.00 as it will be matted after the watercolor has dried.

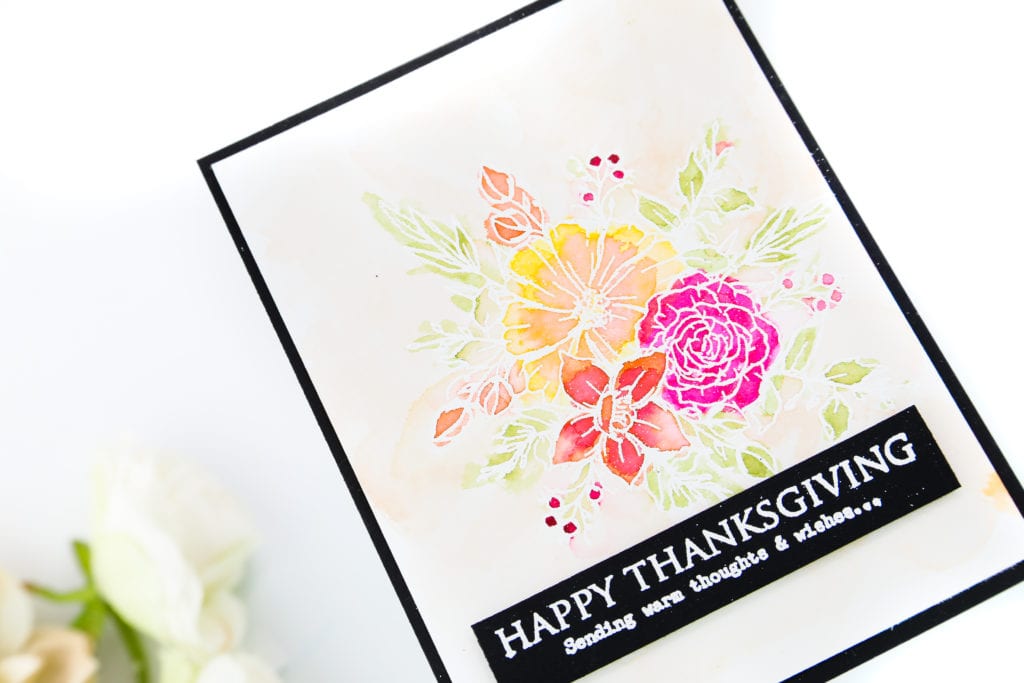
Next, we will heat emboss. With white embossing powder and the images from Autumn Dream, we will heat set the floral and the Happy Thanksgiving sentiment. The black strip will be placed with foam adhesive to a later time when the floral watercolor image is dried.

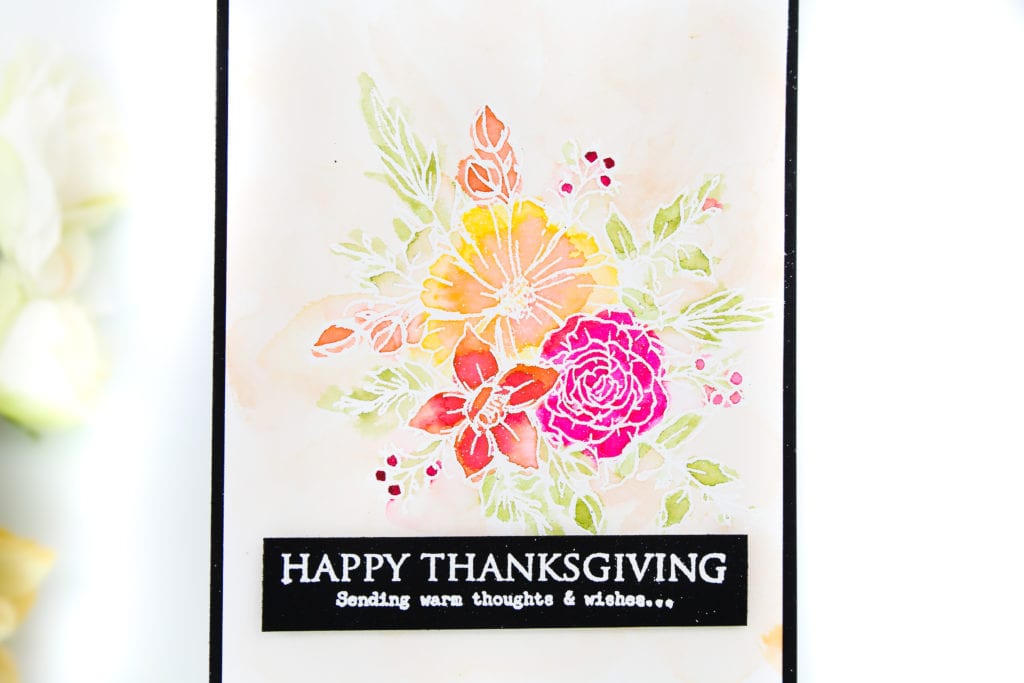
To watercolor, the floral images, begin with a light wash of light brown at the edge and follow through to the edge of the cardstock without coloring any of the actual flowers or leaves.

The proceed to watercolor all the floral images, then add the green color to the leaves with several washes to really have the watercolor look. When are done adding all the colors, I trimmed the sentiment strip that we heat embossed earlier. Then attached to the card panel with foam adhesive.

Alright, guys, I do have a full tutorial video on the whole thing and it shows the entire watercolor process.

https://youtu.be/SqfgVVzjmjw


Thank you for watching!

Crystal Thompson


EmailPrintFriendlyFacebookTwitterPinterest

Filed Under: Stamping Fun

Join Our Email List

You can expect: Videos filled with new techniques, samples using each kit, and exclusive offers just for you! (We promise - we only send the best stuff!)

Footer

100 W Central AVE, New London, MN 56273  |  (320)354-4450  |  [email protected]

facebook pintrest instagram youtube

© 2023 Unity Stamp Co. Developed by Vivid Image. Privacy Policy. Log in