


 Happy Germ-Free Friday
In the midst of all the panic and unknown, we can always come to our craft rooms and create a safe space and some awesome cards! Also, I am now addicted to foiling so let’s make two cards with one toner card front!!
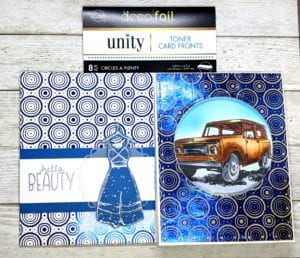
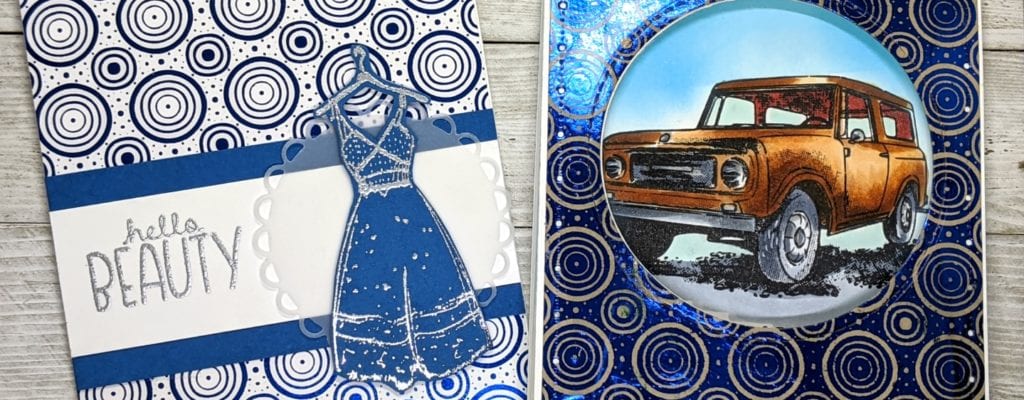
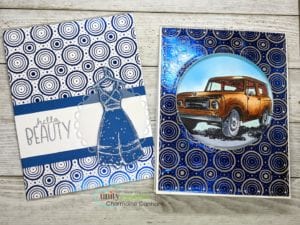
I am using one card front from the Circles a Plenty pack and will show you two ways of foiling.
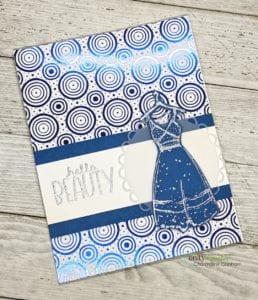
Card with dress
 After letting the laminator heat up for a little bit, feed the printed cardstock with foil (shiny side on top) inside a folded piece of printer paper. Take note of the lines on the back of the foil; you want the lines to be horizontal as you are feeding it through the laminator. Also, add another piece of cardstock underneath the card front for extra pressure. This will give you excellent results every time.
The dress (from the new Kit of the Month, March 2020) is heat embossed with silver and fussy cut, layered over a circle die (I believe from Spellbinders?) cut out of vellum. The sentiment “Hello beauty” is from the “…every single day” sentiment kit which is also heat embossed with Hero Arts Silver Sparkle embossing powder. Layer with white and blue cardstock and place dimensional foam tape under the dress for a pop of interest.
Card with Jeep
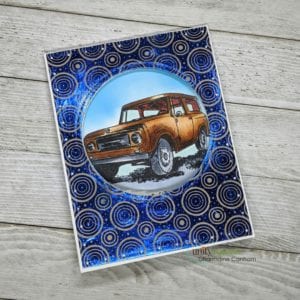
Now that you are left with the negative foil from using it above, let’s make another card! But first, we have to play with Deco Foil Transfer Gel Duo. Apply gel evenly to an A2 piece of 110lbs card stock (Neenah Desert Storm). I have found that 80lbs paper does not hold up as it curls and tears easily. Leave for it for at least an hour to dry! This is very important! If i’s still wet, the foil and paper will tear off together.
Once it is dry, place the negative foil on top of the gelled card and repeat the process through the laminator. You can also run this panel through your embossing machine. The gel makes the paper sticky in a way so the foil will adhere. Then take two top folding A2 cards and cut a circle through the front of one. Cut the same size circle through the foiled panel. Flip the other A2 around so the fold is on the bottom.
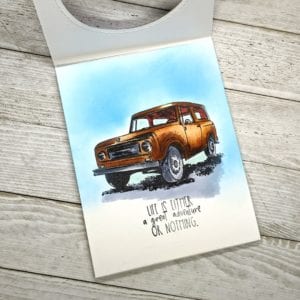
Stamp the Jeep, from the Scout Adventure stamp set, on the upside down card so that is shows through the circle. Color with Copics and stamp the sentiment. I used Tumbled Glass Distress Oxide for the sky. Cut 1/4 inch off the ends of this upside down card because this will help the card fold better and not get hung up on top. Use liquid adhesive to wiggle the card in place.
I hope you enjoyed this post! You can make Him and Her sets for weddings, showers and… boy/girl twins! 😉 Have a great weekend!!
Charmaine
CharCards


