• Skip to primary navigation
  • Skip to main content
  • Skip to footer
facebookpintrestinstagramyoutube

Unity Blog

account
Menu
  • Sale
  • Shop Products
      • SHOP Supplies
        • ALL Supplies
        • Adhesives
        • Blending Tools
        • Ink
        • Card Bases
        • Embellishments
        • Embossing
        • Stamp Storage
        • Stamping Tools
        • Tags {Kraft & Manilla}
        • Clothing
      • SHOP Stamps
        • 2018 Newest Releases
        • Cuddlebugs
        • Itty Bitty Line
        • Sentiment Kits
        • ANGIEgirls
        • SHOP by THEME
        • SHOP by ARTIST
      • Gift Cards
    • Close
  • Memberships
    • Memberships
    • Kit of the Month
    • Layers of Life
    • S.M.A.K
    • Uniquely Unity
    • Close
  • Blog
    • Blog
    • Design Team
    • Artistas
    • Close
  • About
    • About
    • Terms & Conditions
    • Angel Policy
    • Shipping Policy
    • Contact Us
    • Close
  • Custom Stamps
Watermark background card with accents + tutorial

April 29, 2020 - by Gaylynn

Watermark background card with accents + tutorial

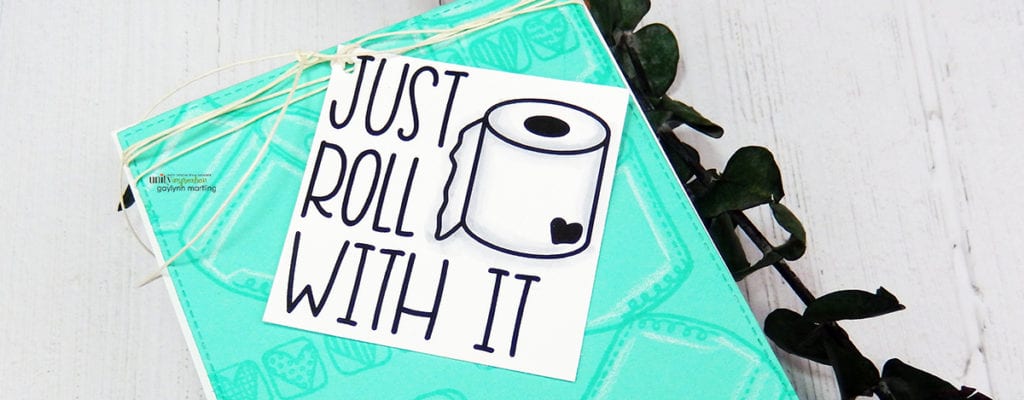
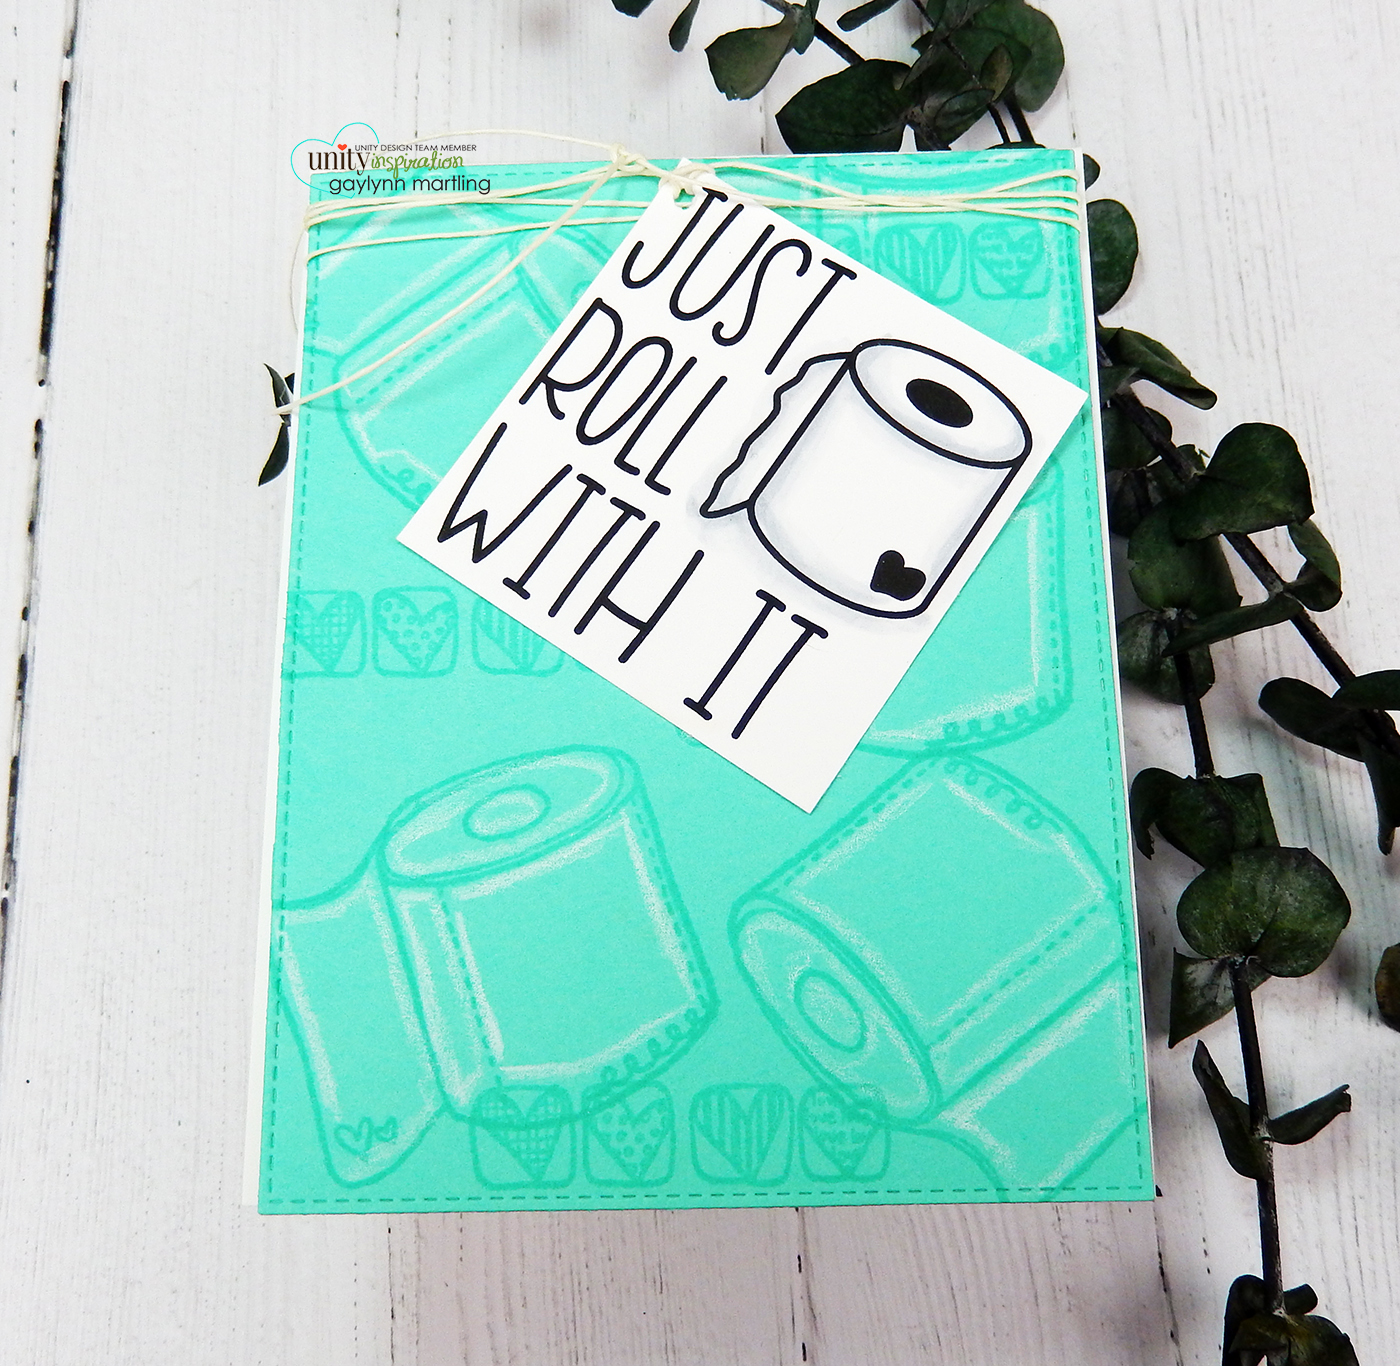
Hello.  Gaylynn here with my Technique Time series. Today, I am sharing a watermark background card with added accents in white and gray.
Adding a watermark background is one way to add soft stamping detail to a card.  It can easily be made to coordinate with the main card focus.
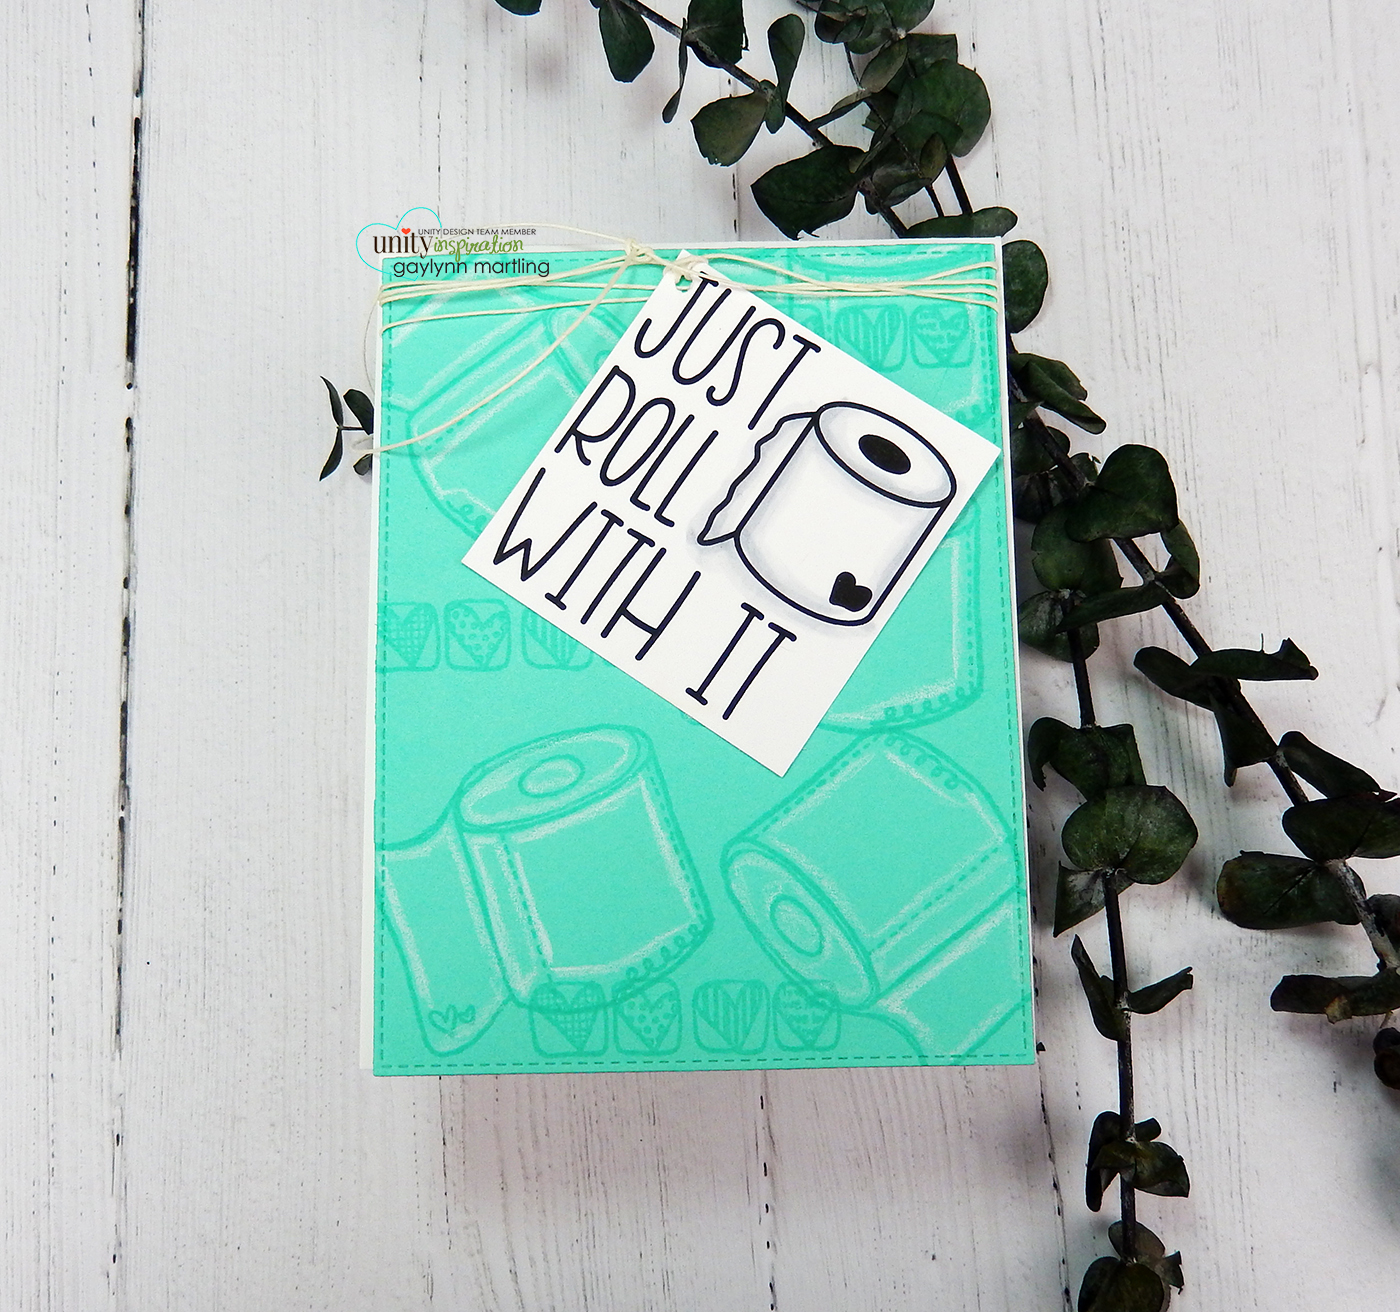
Sentiment:  Just roll with it.
Helpful tips:
Here are helpful tips for creating a watermark background for a card.  First, trim or die-cut a background panel from colored cardstock.  Then, stamp and trim the sentiment panel.  Next, using the mini Misti stamp positioner and VersaMark ink or watermark ink, stamp the toilet paper rolls and the hearts all around the cardstock panel.  Optional, repeat the stamping to get the best stamp impression.  Next, add white accents to the tp rolls using a colored pencil.  Also, add gray color accents to the roll on the sentiment panel to create a bit of dimension.  I used gray Copic markers, but gray colored pencils would work, also.  Finally, layer the card, add the sentiment tag and the twine, to finish.


Unity Stamp Co. products used:
Lil’ Bathroom Humor
Crappy Day
Mini Misti

*
*

Here is another look.

Finally, here is my video tutorial for this project.  It will detail the full process.

Remember, if you want to view my other projects on the Unity blog, see my features linked below.

Technique Time
Watercolor Wednesday
.

Tune in next Wednesday with a new project for Technique Time.
Thanks for visiting.

Gaylynn

EmailPrintFriendlyFacebookTwitterPinterest

Filed Under: Stamping Fun Tagged With: background, backgrounds, colored pencil, Copic Markers, funny, Gaylynn Martling, repeat stamping, Technique Time, watermark

Join Our Email List

You can expect: Videos filled with new techniques, samples using each kit, and exclusive offers just for you! (We promise - we only send the best stuff!)

Footer

100 W Central AVE, New London, MN 56273  |  (320)354-4450  |  [email protected]

facebook pintrest instagram youtube

© 2023 Unity Stamp Co. Developed by Vivid Image. Privacy Policy. Log in