
Hi friends! I recently shared a card that I’ve gotten tons of questions about. It’s a super simple card that I know you’ll want to try to re-create using your favorite pattern papers or even paper scraps!
I call it my quilted card– here it is:
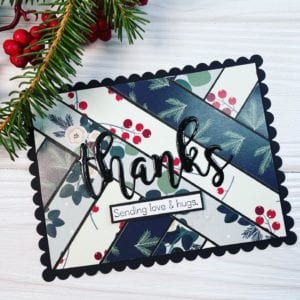
I’m loving the new Farmhouse Christmas paper pack and really could not decide which patterns to use for which cards! They were all so pretty. I love when people layer multiple patterns together but it just wasn’t coming together for me… so I went to Pinterest and found a layout kind of like this.
Seeing that card gave me this idea and I had to try to see how it would turn out! I love the combination of colors and patterns and the almost quilted look!
Here’s how its done:
-
I chose 3 different patterns from my 6×6 Farmhouse Christmas paper pack. I love using patterns from the same paper pack because all of the colors and patterns really compliment each other.
-
I then cut each paper into 1/2 inch strips using my paper cutter and set them aside.
-
I die cut out a black piece of cardstock using my Stitched Rectangle Die by Gina Marie Designs– then I grabbed an additional piece of black cardstock and cut it down so it would fit right inside of of that stitched rectangle and the scallop served as a sort of frame.
-
I grabbed those paper strips and began assembling on the smaller piece of black cardstock. I knew i wanted each of the patterns to really be represented so I started by putting 3 pieces diagonally near the middle of the card. At this point you can kind of set all of your sheets in place and get a general idea for your layout- I just kinda went with it and added some adhesive to the back of the 3 diagonal pieces and adhered them leaving a tiny space between each so the black cardstock can peek out.
-
Now it’s time to add in our pieces on the sides– I started with one side and completed that first– adding adhesive to the back and setting them in place, again leaving small spaces. You’re going to have a lot of the paper strips hanging off of your card at this point– it is totally okay! Finish adhering your paper strips down on both sides until the pattern is completed.
-
Flip your card over and cut off the extra pieces of cardstock hanging off of the back of the paper.
-
Now you have a fun pattern! Use the strips to create additional cards!
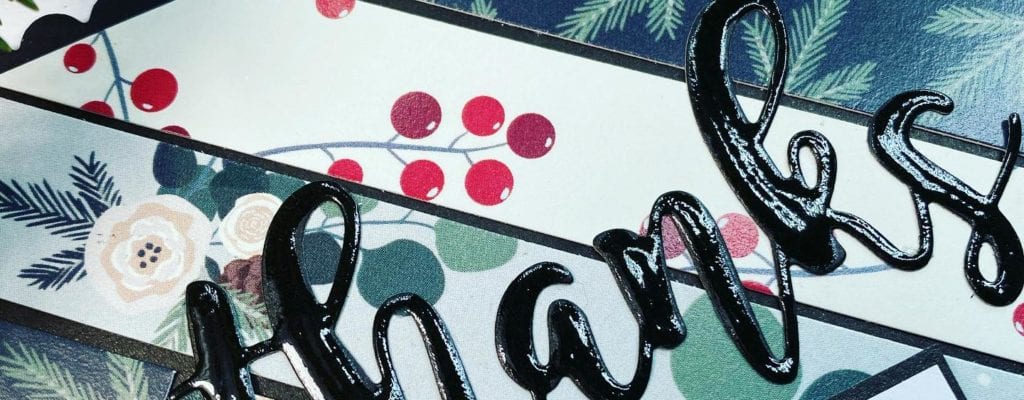
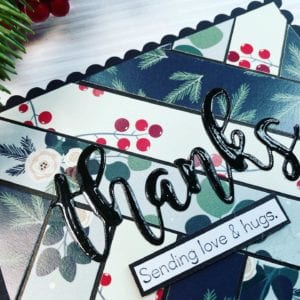
To really make this card pop I die cut out “thanks” with our Essential Greetings set in black cardstock and adhered it to my card using Gina K Connect Glue.
Then I grabbed a fun little sentiment from Say it With Love— {which is a must have stamp set by the way!} and stamped on white and matted that sentiment on some black cardstock and popped it up with some foam adhesive.
To add a bit of shine and a dimensional look I added some Nuvo Glossy Accents over the top of the die cut “thanks.” Once dry it almost gives the look of patent leather! So shiny and pretty!
So what are you waiting for… go grab your pattern papers and scraps and start creating your own quilted designs! TAG me over on the Unity {show & tell} so I can see your creations using this fun technique. I cannot wait to see what you create!
xoxo,
Whit