


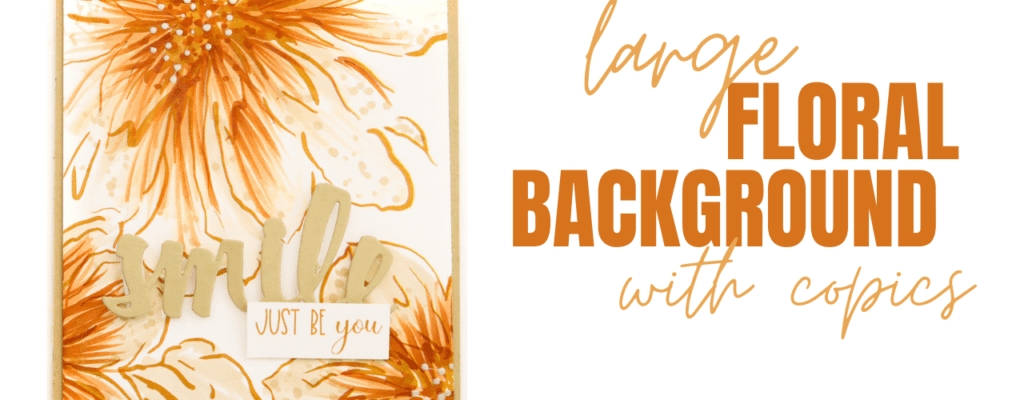
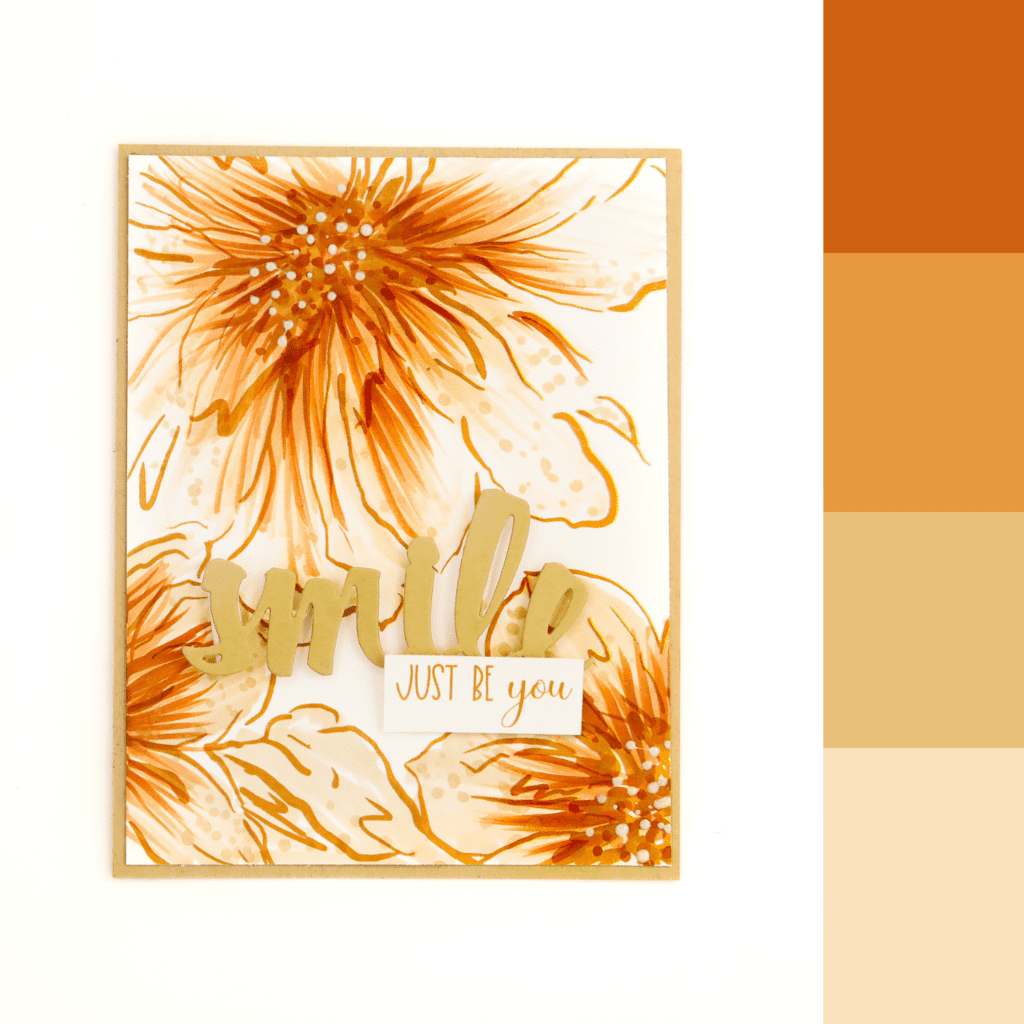
Hey there! Crystal here with a fun and easy card using the newest Inked Floral background stamp set from unity to create a large floral background card with Copics. Today’s color combination inspiration is a set of lovely orange tones to tie in a fun kraft card base and simple “smile” die.
For this card you will need the following products:
- Inked Flora stamp set from Unity Stamp Co.
- Hello Fresh Start kit from Unity Stamp co.
- 4 Set of Copics
- Kraft Cardstock
- “smile” die or die-cut from die cutting machine.
- White cardstock
- Oyster Gray Nuvo drops
- Foam Adhesive
- Roller Adhesive
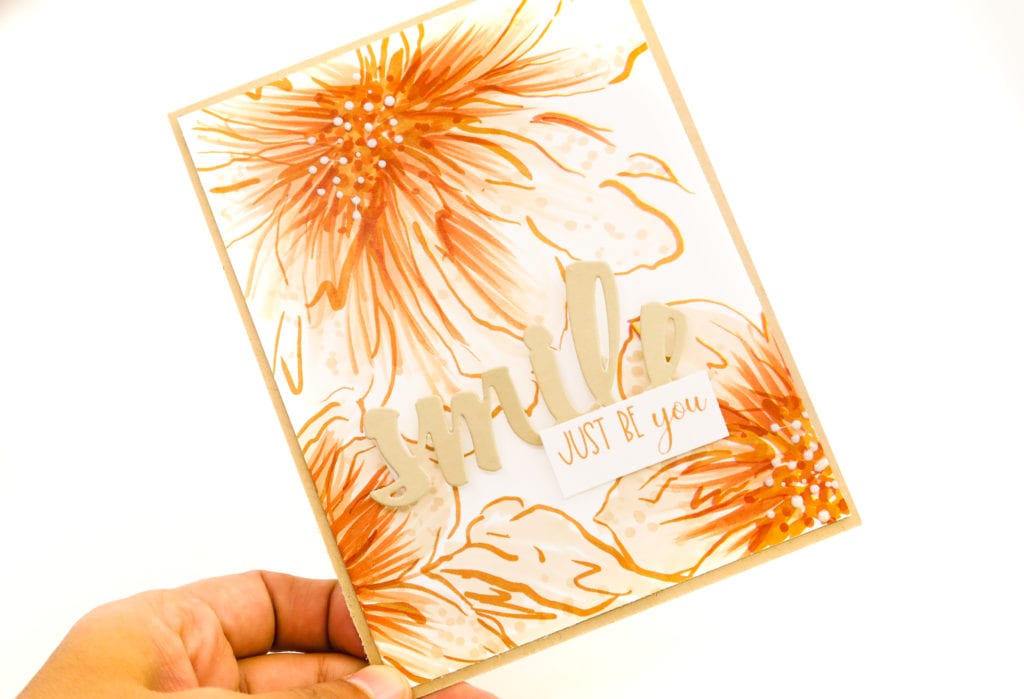
To make this card we will start with trimming and stamping the image. First, we will be trimming kraft cardstock to 4.25 x 5.50 inches, then stamping the Inked Floral onto white cardstock using brown ink. I did trim this to 4.00 x 5.25 inches so there would be a nice matting behind it.
Then I stamped the sentiment from the Hello Fresh Start using the same brown ink, the sentiment reads “Just Be You”. This pairs nicely with a “smile” die cut from the same kraft cardstock.
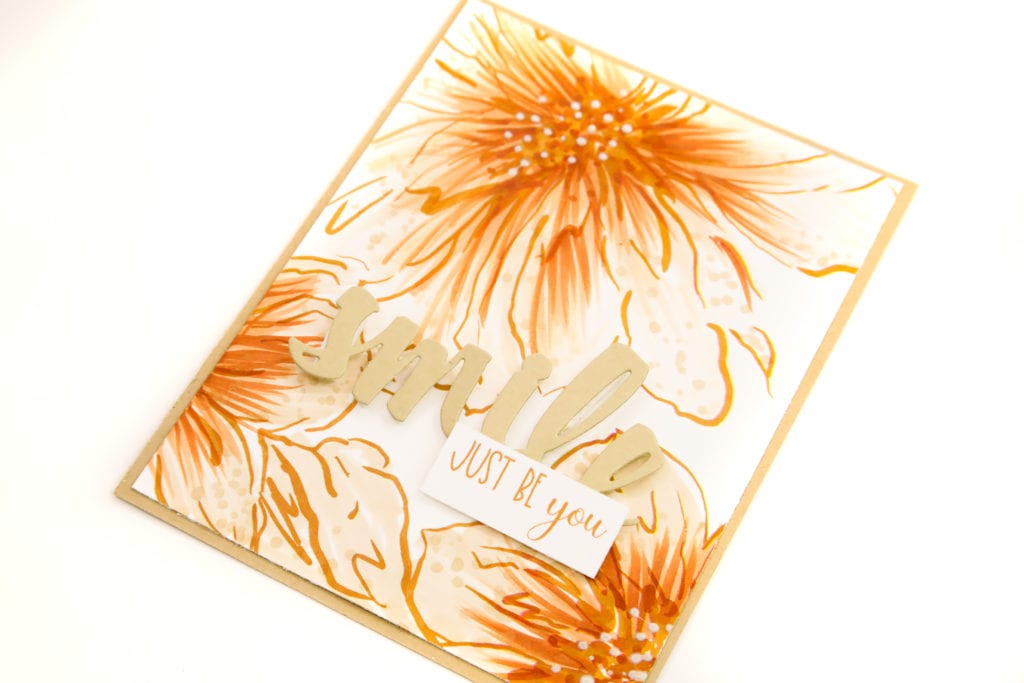
Once everything is stamped and die-cut, I will begin the coloring with Copics. I used e43, e53, e15, and e15. First, I did a rough color of e43 to the whole image set as my base color. Then I used e53 to the bottom set of florals to add a bit of dimension. For the middle shadow, I came in with e13 and stayed closes to the center of the flower and the outer edge of the cardstock. To finish up I used e15 to add dark shadows and really make things pop.

When everything was colored, I added dots of E53 and E13 to make things look a little more whimsical.
While that dries out, I added the “smile” die cut using foam adhesive, then added the Just Be You stamped image over it with foam adhesive too!
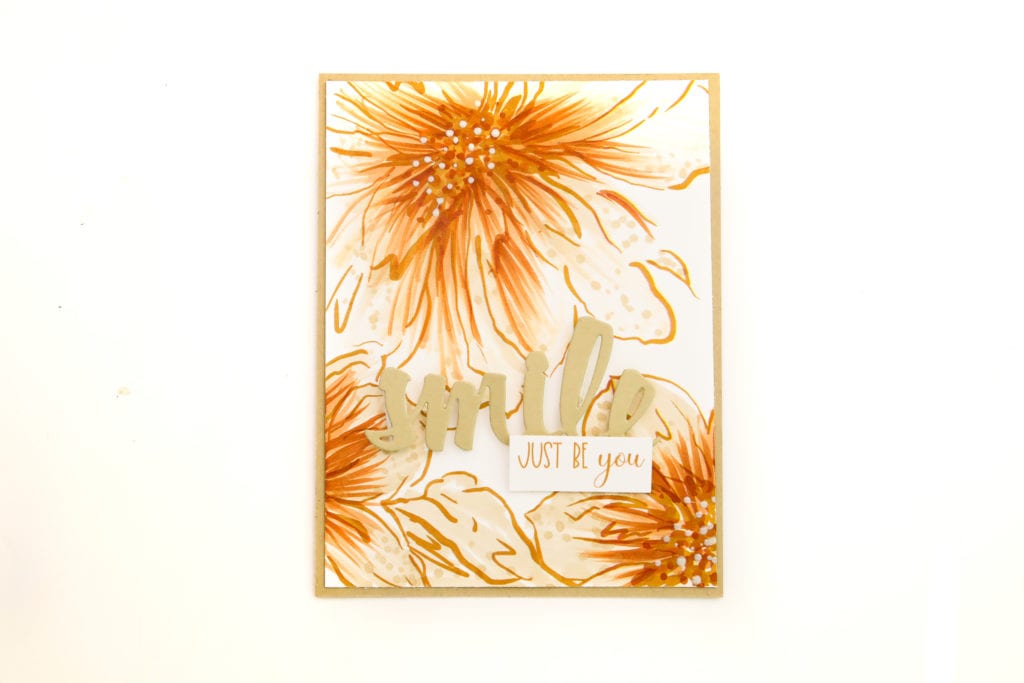
To add embellishment, the Oyster Gray Nuvo drops were used and added to the center of the florals to add some pop of white that might have been lost during the coloring process.
And guys, that does it for me. I have the full video tutorial on this project down below.
https://youtu.be/lg_qqdWwZBI
Thanks so much!
Crystal!


