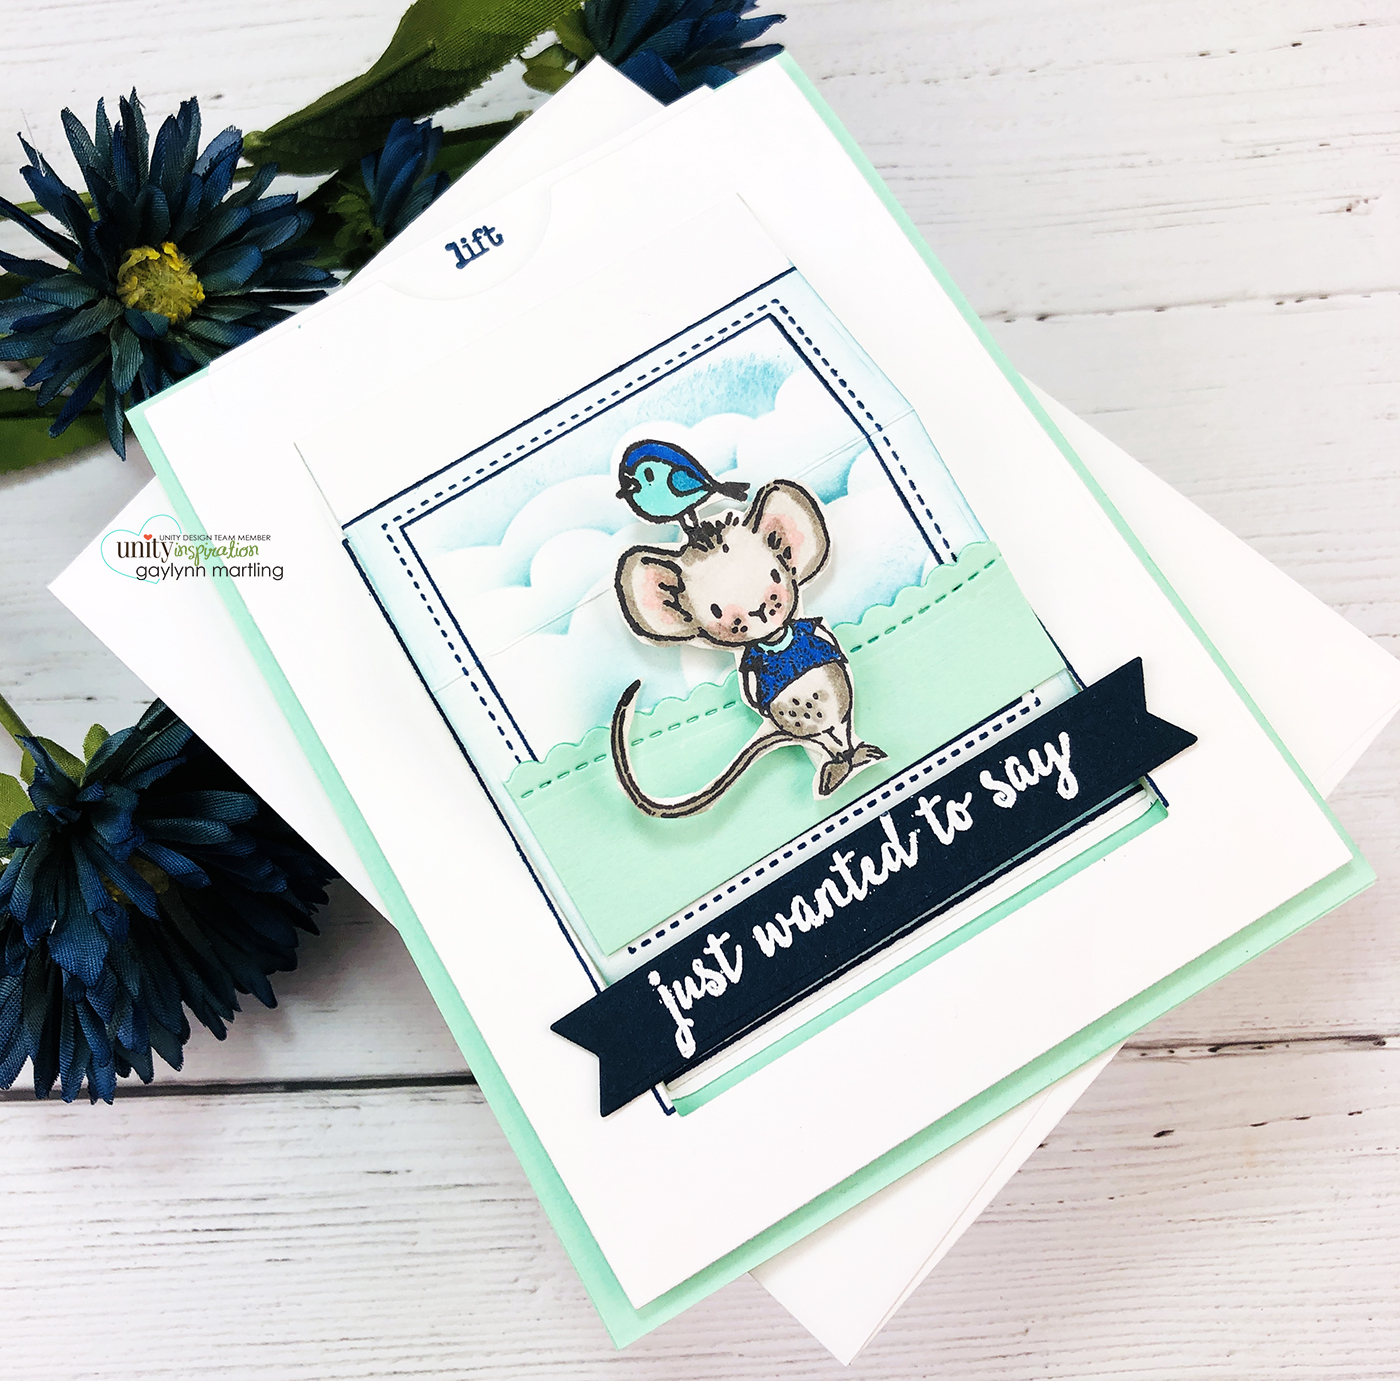
Hello. It’s Gaylynn here. For Technique Time at Unity Stamp Company, I show a way to incorporate elements to make an interactive slider card with a mouse scene.

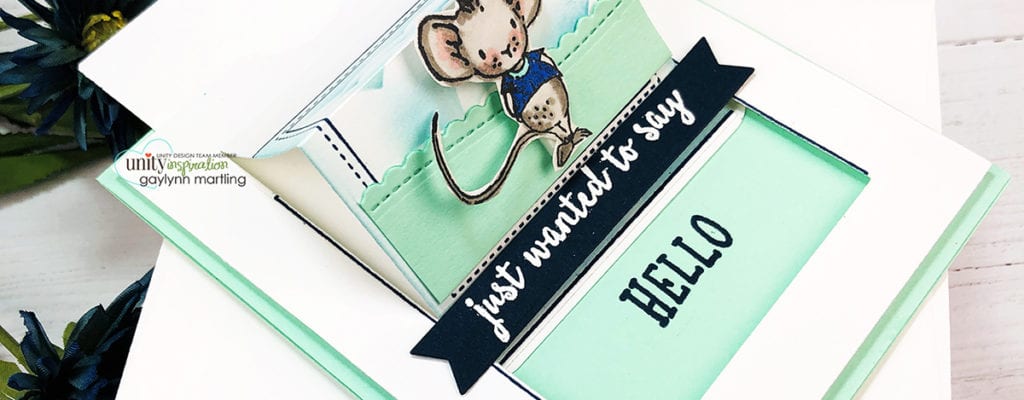
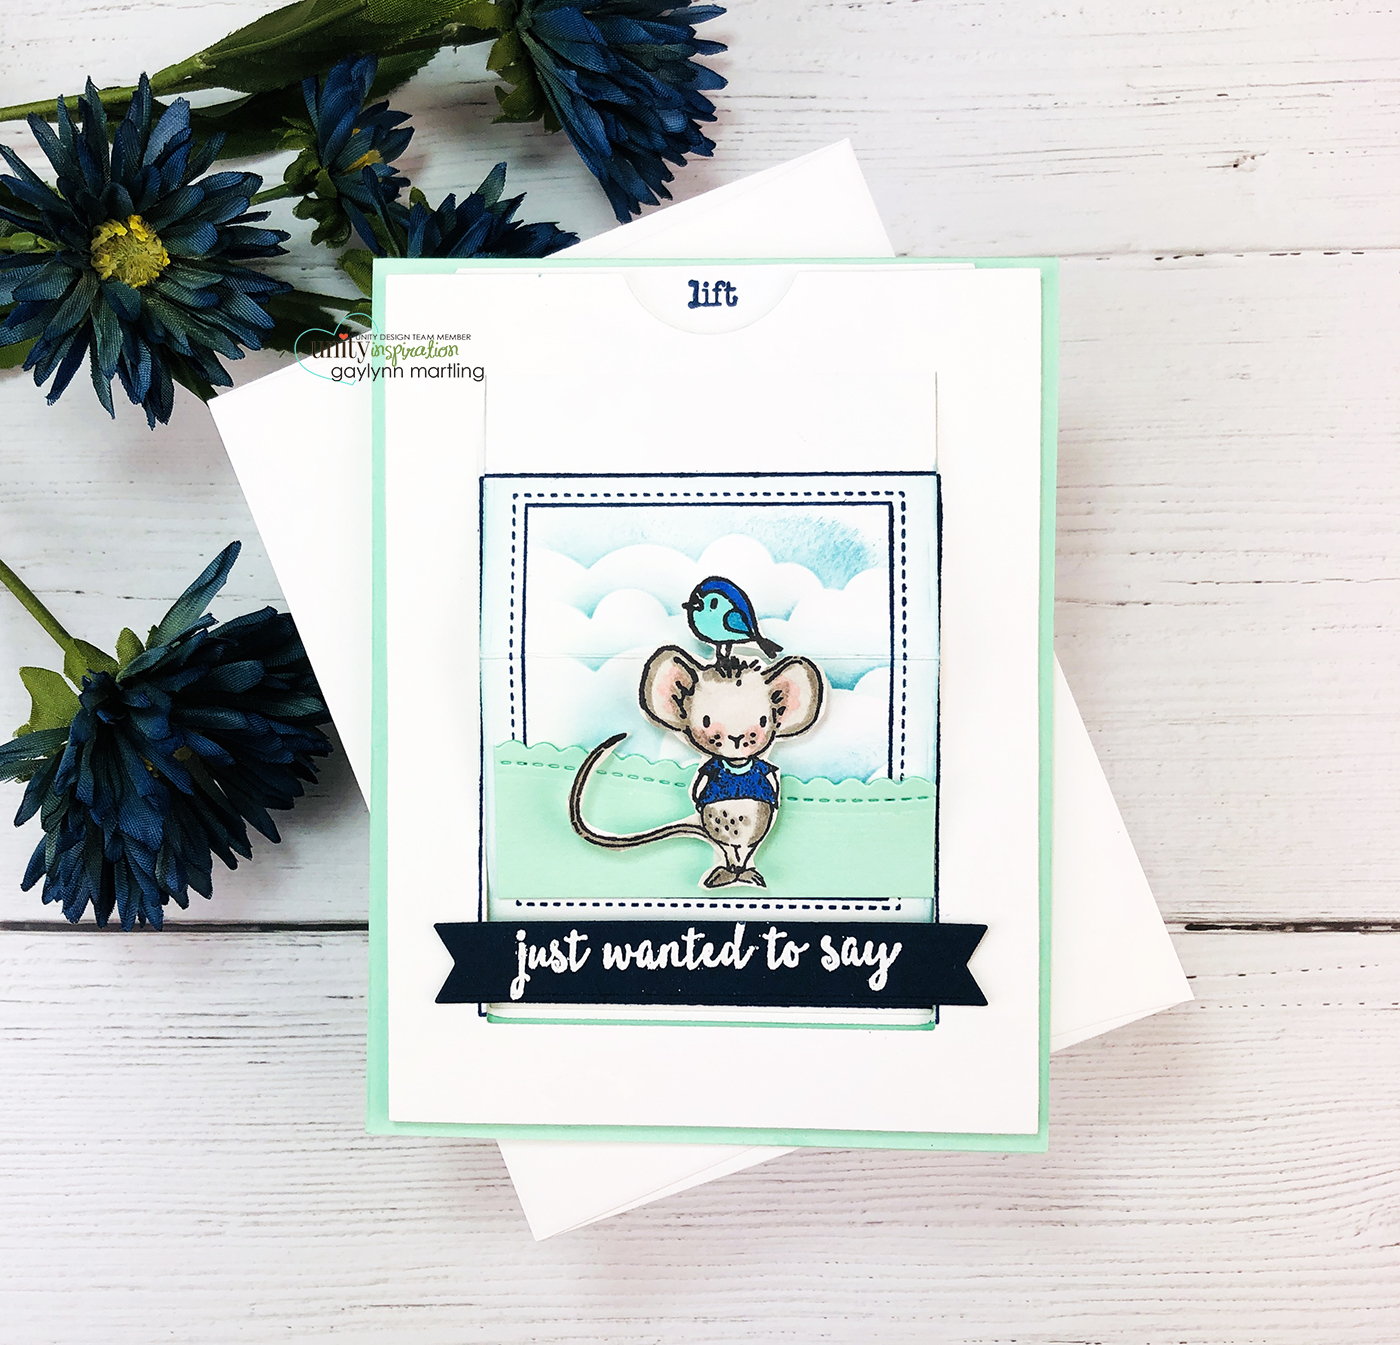
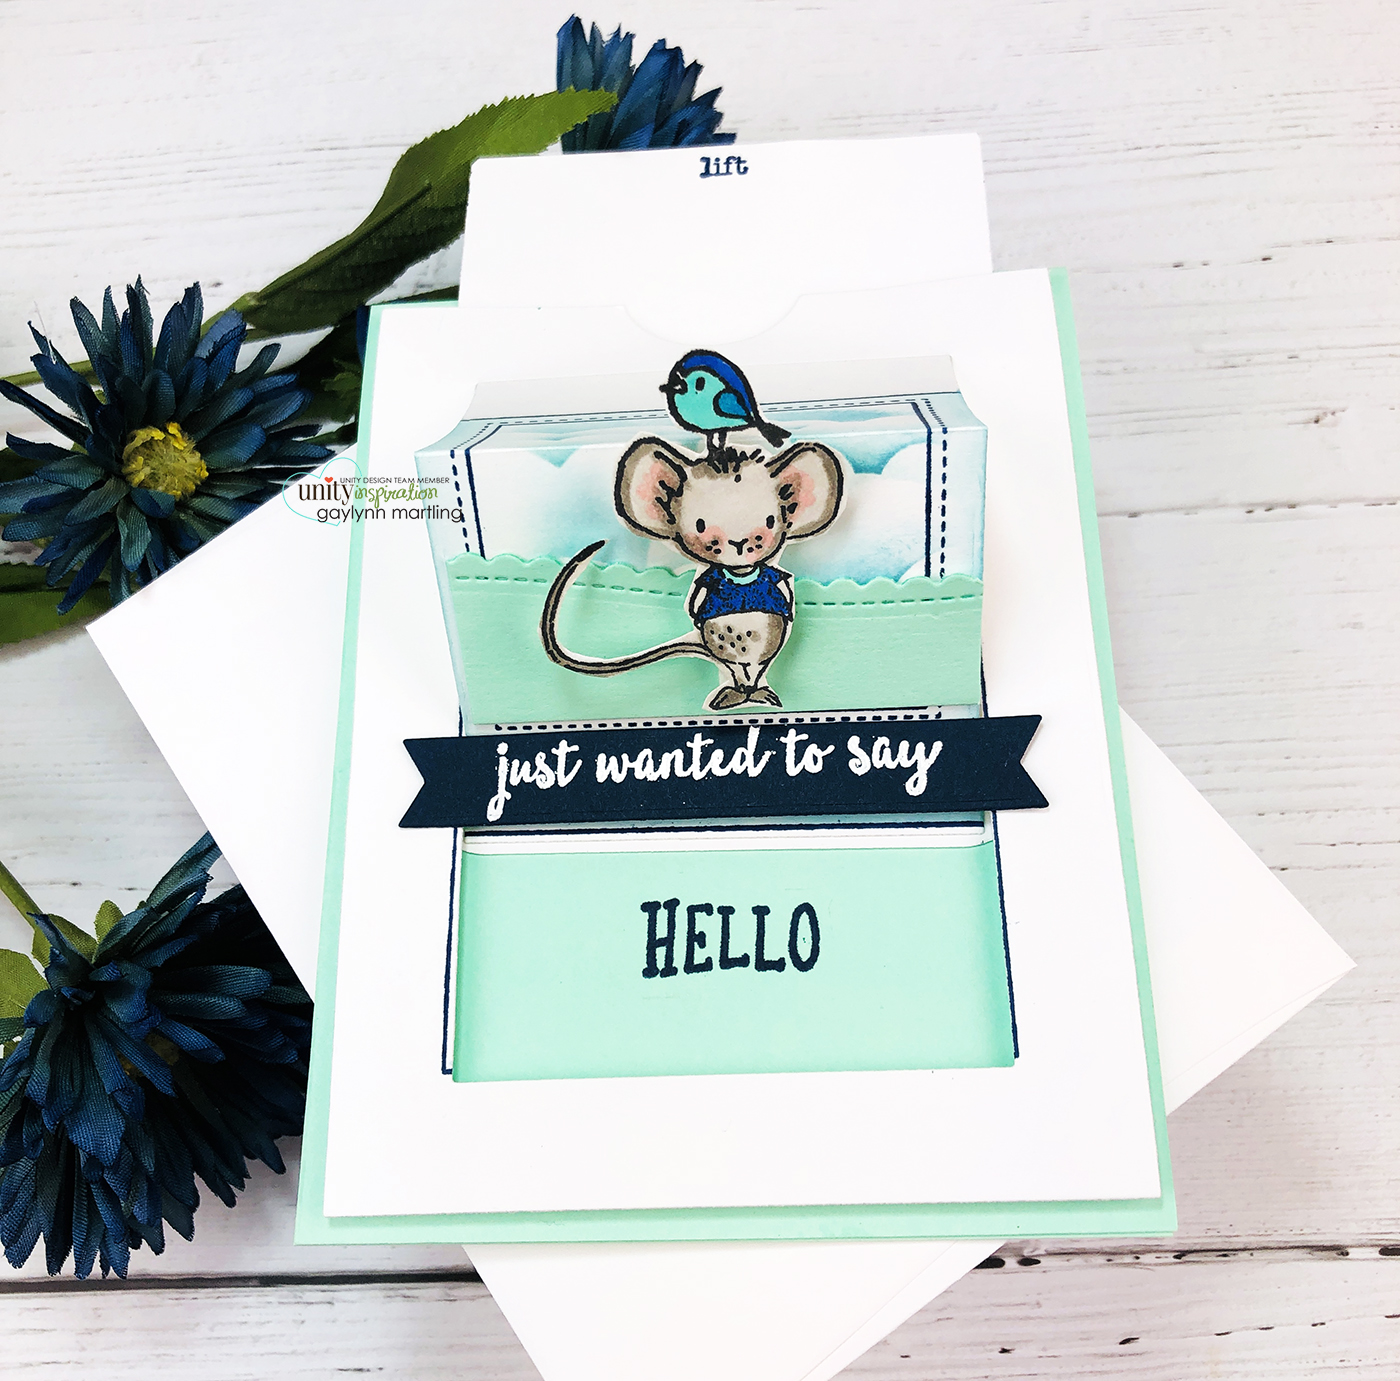
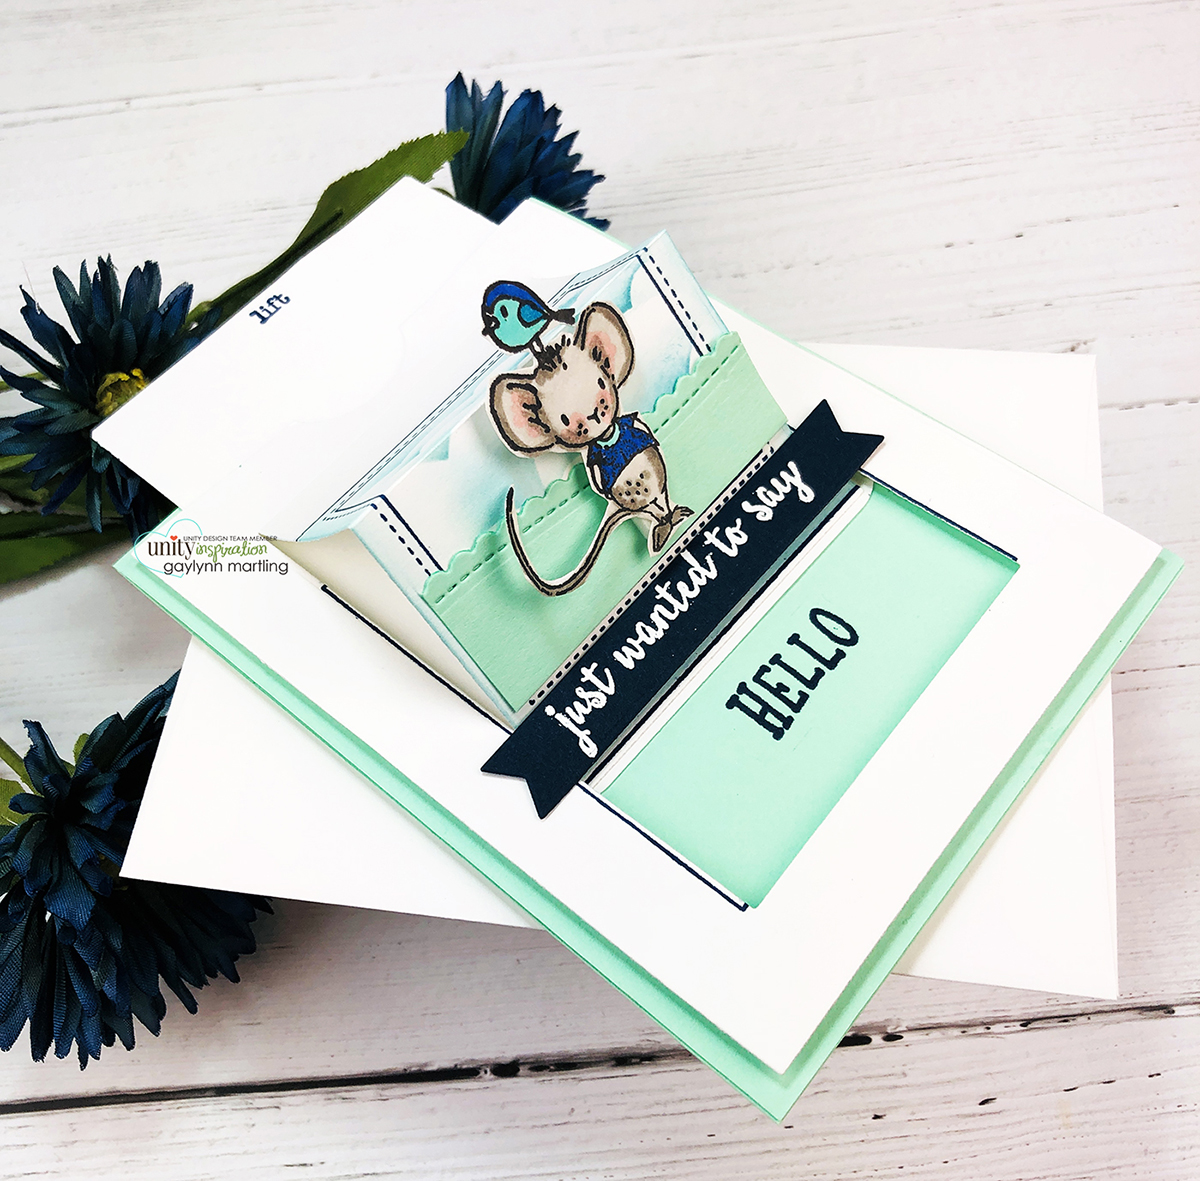
This is an interactive slider card with a cute mouse scene. There is a lift tab and when pulled up the mouse scene lifts up to reveal the hello sentiment inside.
 Sentiment: Just wanted to say hello.
 Helpful tips:
Here are helpful tips for creating this interactive slider card. To begin, stamp a card front using the interactive verbiage stamp set. I used the original Misti and stamped it onto an oversized cardstock piece. Next, die-cut or trim around the scene panel to make a flip-up section. Then, make a little scene with the mouse and a sentiment strip for the front. Also, trim a lift panel to go behind the scene panel. Assemble according to the video tutorial. Finally, layer it all to allow the lift panel to move up and down on the card front.
 Here is my video tutorial for this project. It will detail the full process.
Supplies: Unity Stamp Co. Country Mouse Hello, Interactive Verbiage and Clouds and Waves {stencil}.
Also, foam and flat double-sided tape, cardstock, Original Misti, MFT extreme black ink, Ranger ink in cobalt, distress oxide ink pad in broken china; Wow embossing pad, MFT die-namics slider surprise, stitched scallop basic edges and a flag; Post-It tape, ink blending brush, Copic markers B26, B05, BG32, W1, W5, R20.
Remember, if you want to view my other projects on the Unity blog, see my features linked below.
Technique Time
Watercolor Wednesday.
Please, tune in next Wednesday with a new project for Technique Time.
Thanks for visiting.