


Happy Friday! This is Jules of Paper Gems by Jules here on the blog just sharing a little more about my creative journey. I’ve been struggling to create lately and spent a weekend away crafting and I didn’t produce much, but I did get to rest… my soul needed to rest. This weekend, I wanted to share something a little different for me… a one layer card (kind of).
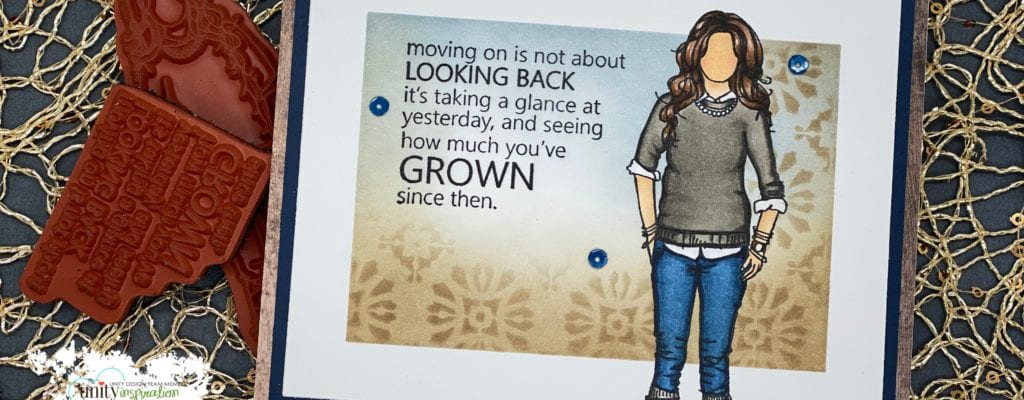
This card features the Aleah Girl stamp set in a bold way. By masking a specific spot, she comes to life. Here’s a quick step-by-step tutorial on how to use masking to create a bold scene.
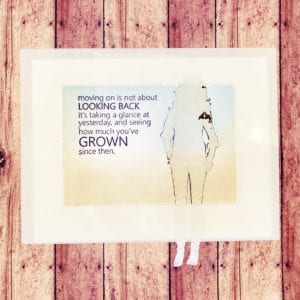
Step 1. Stamp the image in the area that you’d like to highlight. I opted to utilize the cornered sentiment and create a rectangular mask.
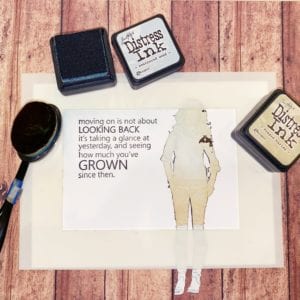
Step 2. Create a mask for Aleah Girl and cover her up. Next, create a shape mask. I used a stencil that allows me to highlight a rectangular section. Using micropore tape, I adhered the stencil to the card so that I had less chances of messing it up… because it happens to the best of us.
Step 3. Using Frayed Burlap and Weathered Wood, I inked up the background. I selected colors that complimented the colors of her outfit and applied them to opposite areas. Her jeans were blue, so I highlighted the top using the blue Weathered Wood ink. Her sweater was a grey/brown, so I used the Frayed Burlap on the bottom.
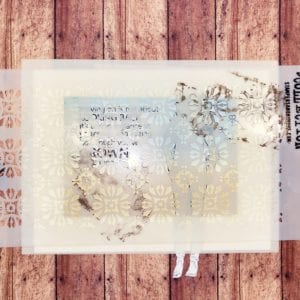
Step 4. Before removing the stencil or masks, layer the highlighted section with a stencil. I used a darker brown ink over the lower edge and right hand edge. You can also use a mixed media gel or do some heat embossing over the edges too.
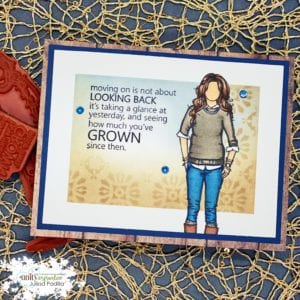
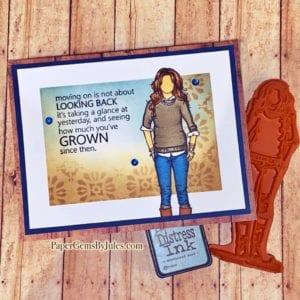
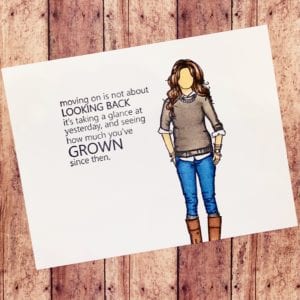
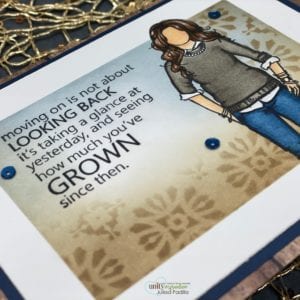
Last step: Remove the stencil and masks and wow! Aleah Girl stands boldly on this card and highlights the beautiful sentiment. I layered it on navy card stock before adhering it on a wooden plank card base.
By creating this blocked off section, you reduce bulk and still create dimension. And it’s super easy to do! You can create your own masking stencils using shape dies as well. This is a great way to create a focus point on your next card.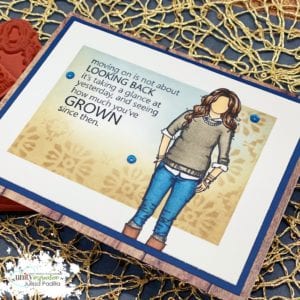
I happened to find some navy sequins and added them for a little bling to finish off this card. Thank you so much for stopping by today and I hope you found some inspiration. We all have days that we struggle to create and that’s okay. Just give your creativity some space and it will soon bloom again.
Until next time… Happy Crafting!
Jules


