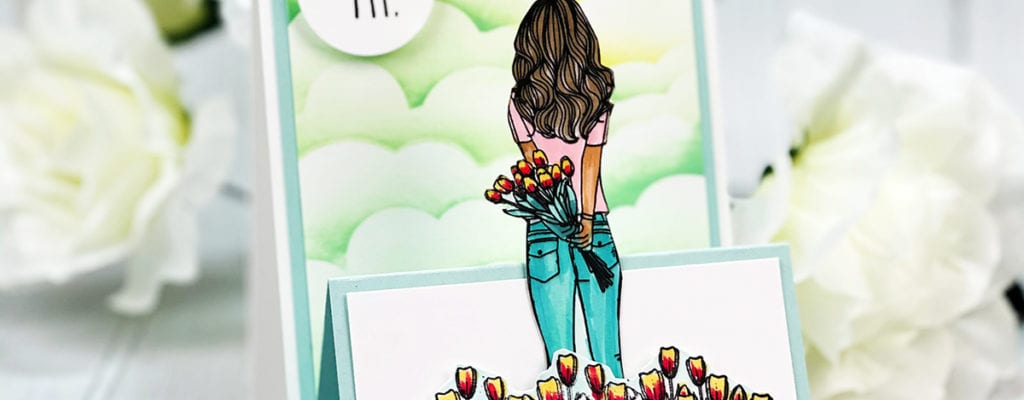
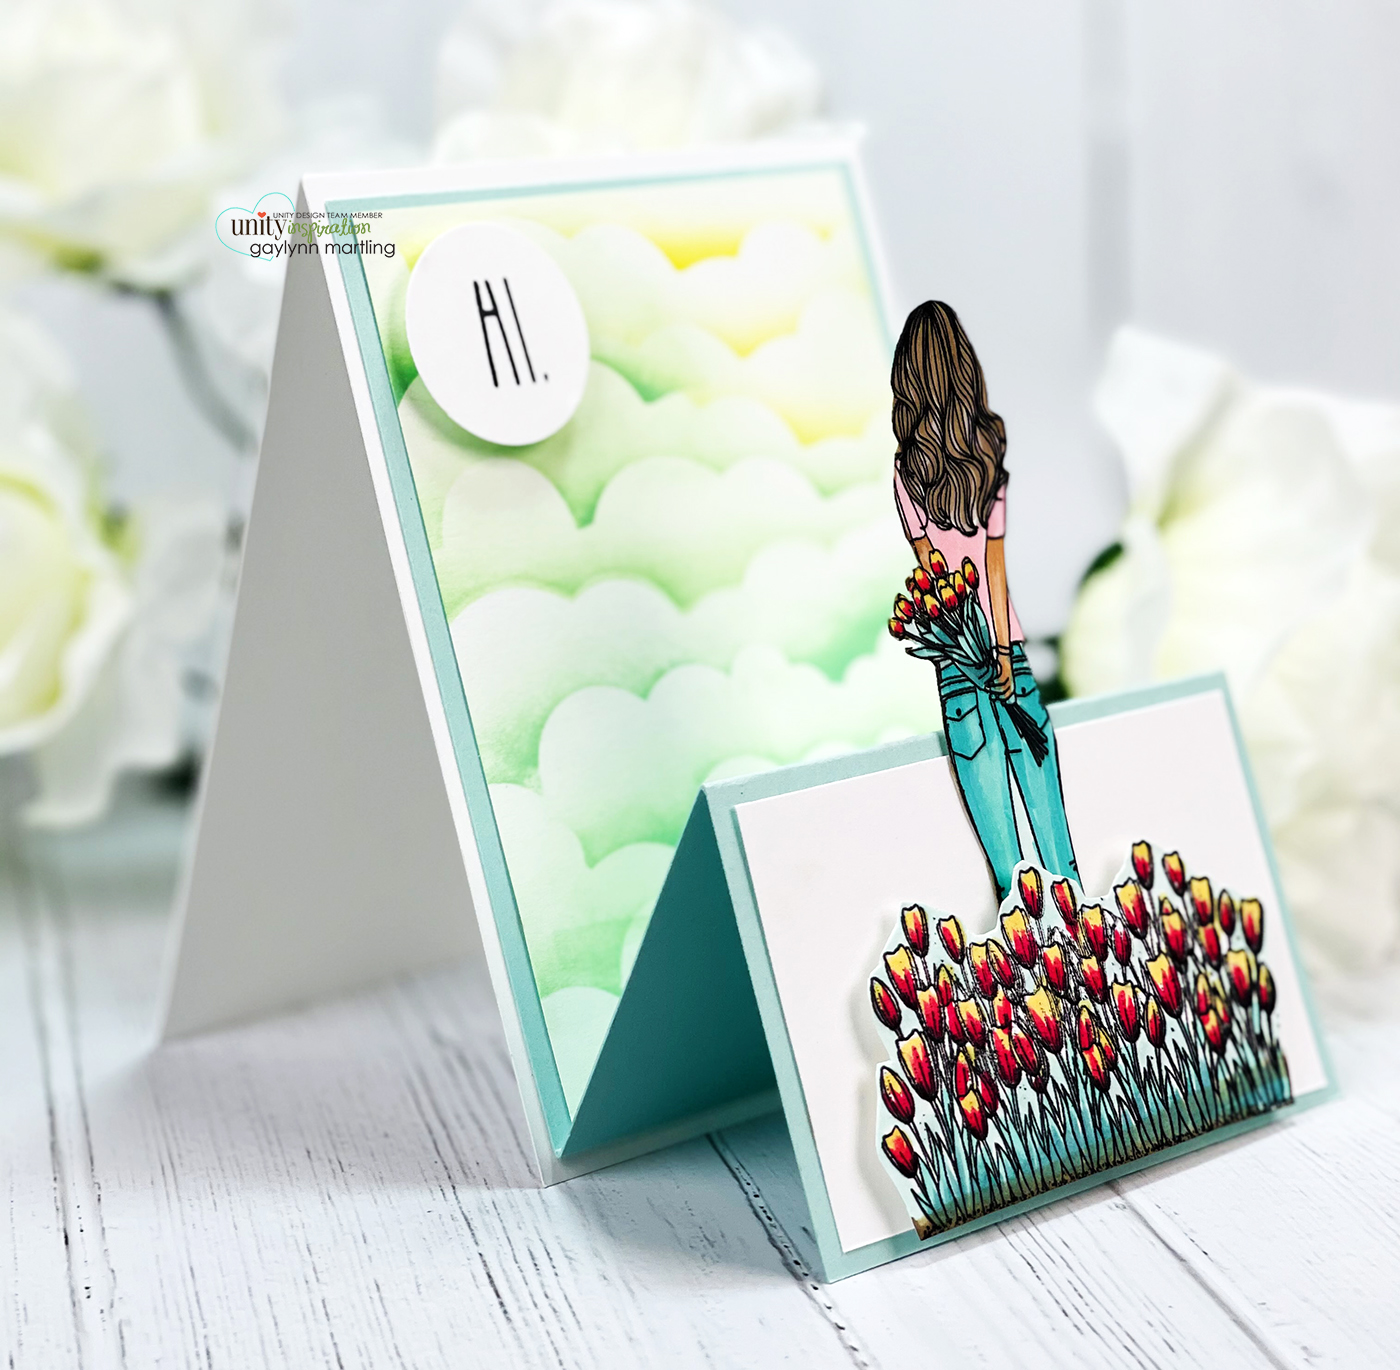
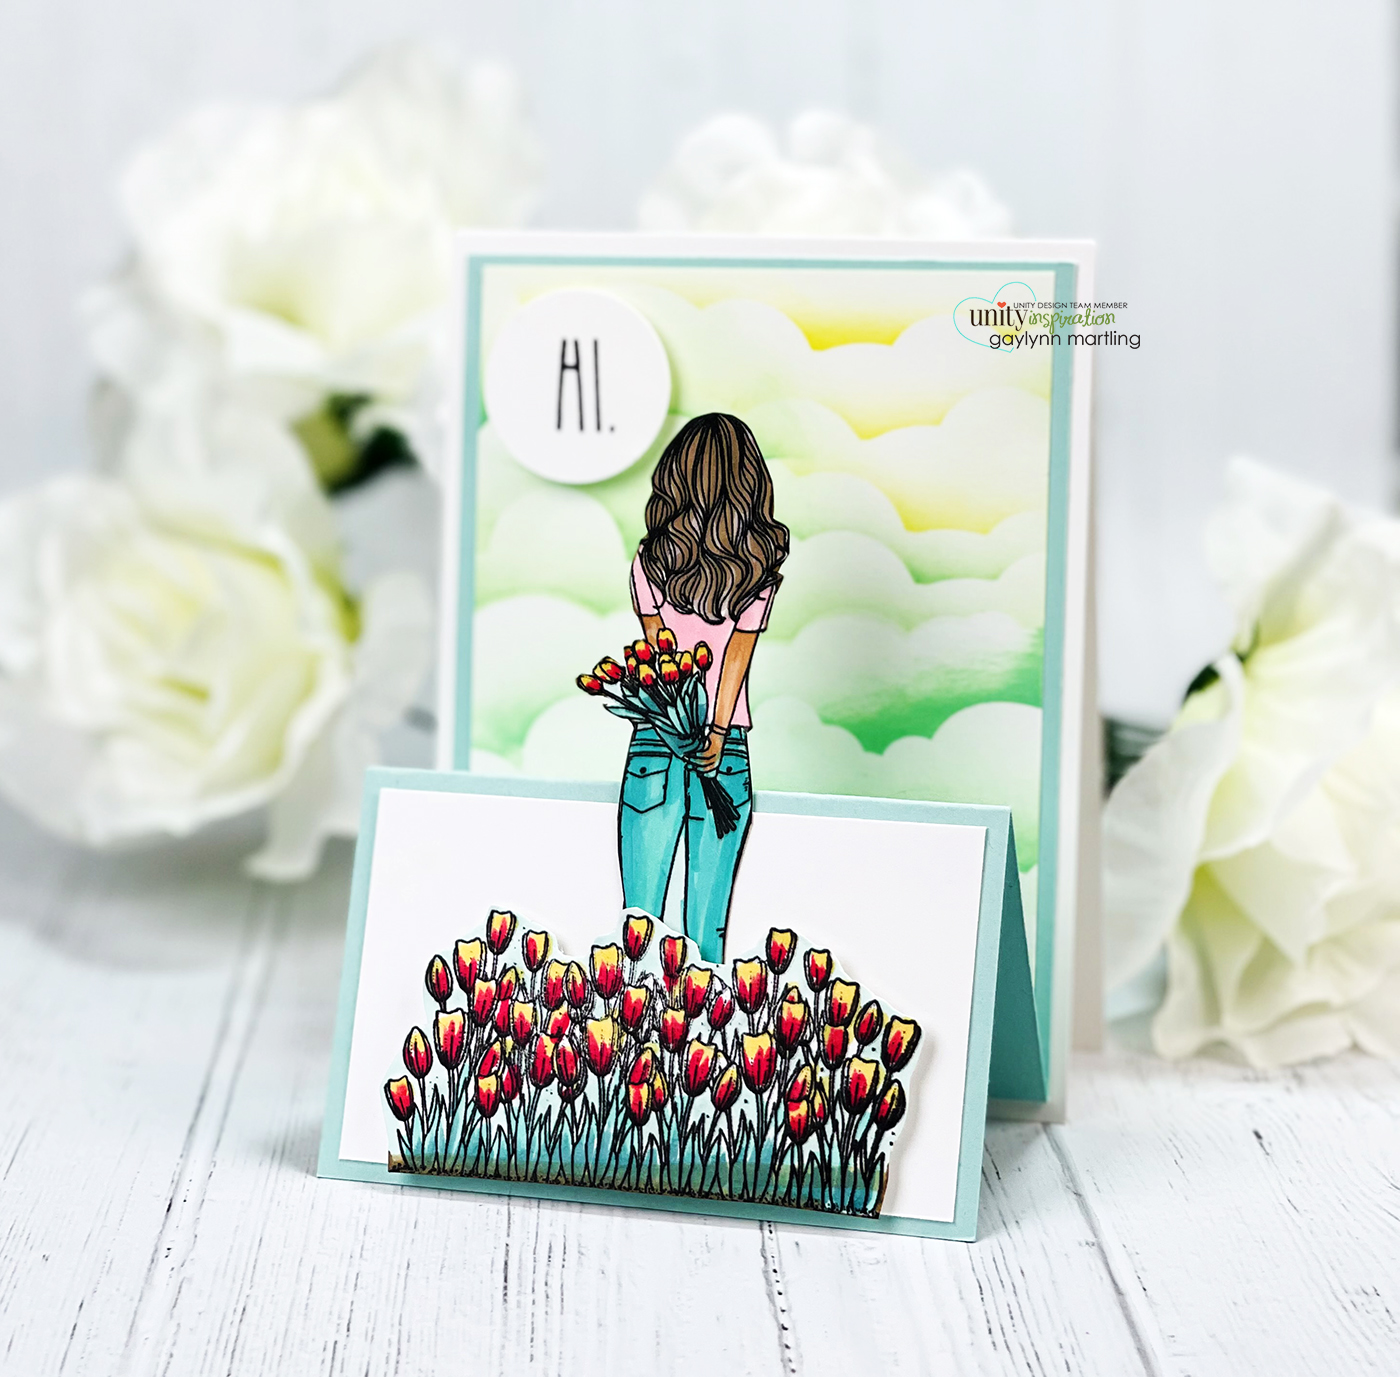
Hello. It’s Gaylynn here. For Technique Time at Unity Stamp Company, I am showing a way to make an easel card that includes an outdoor scene. In this tutorial, no dies are used.

Incorporating an easel card technique is a great way to add interest and dimension to a handmade card. It is interactive and is includes pretty scene building.
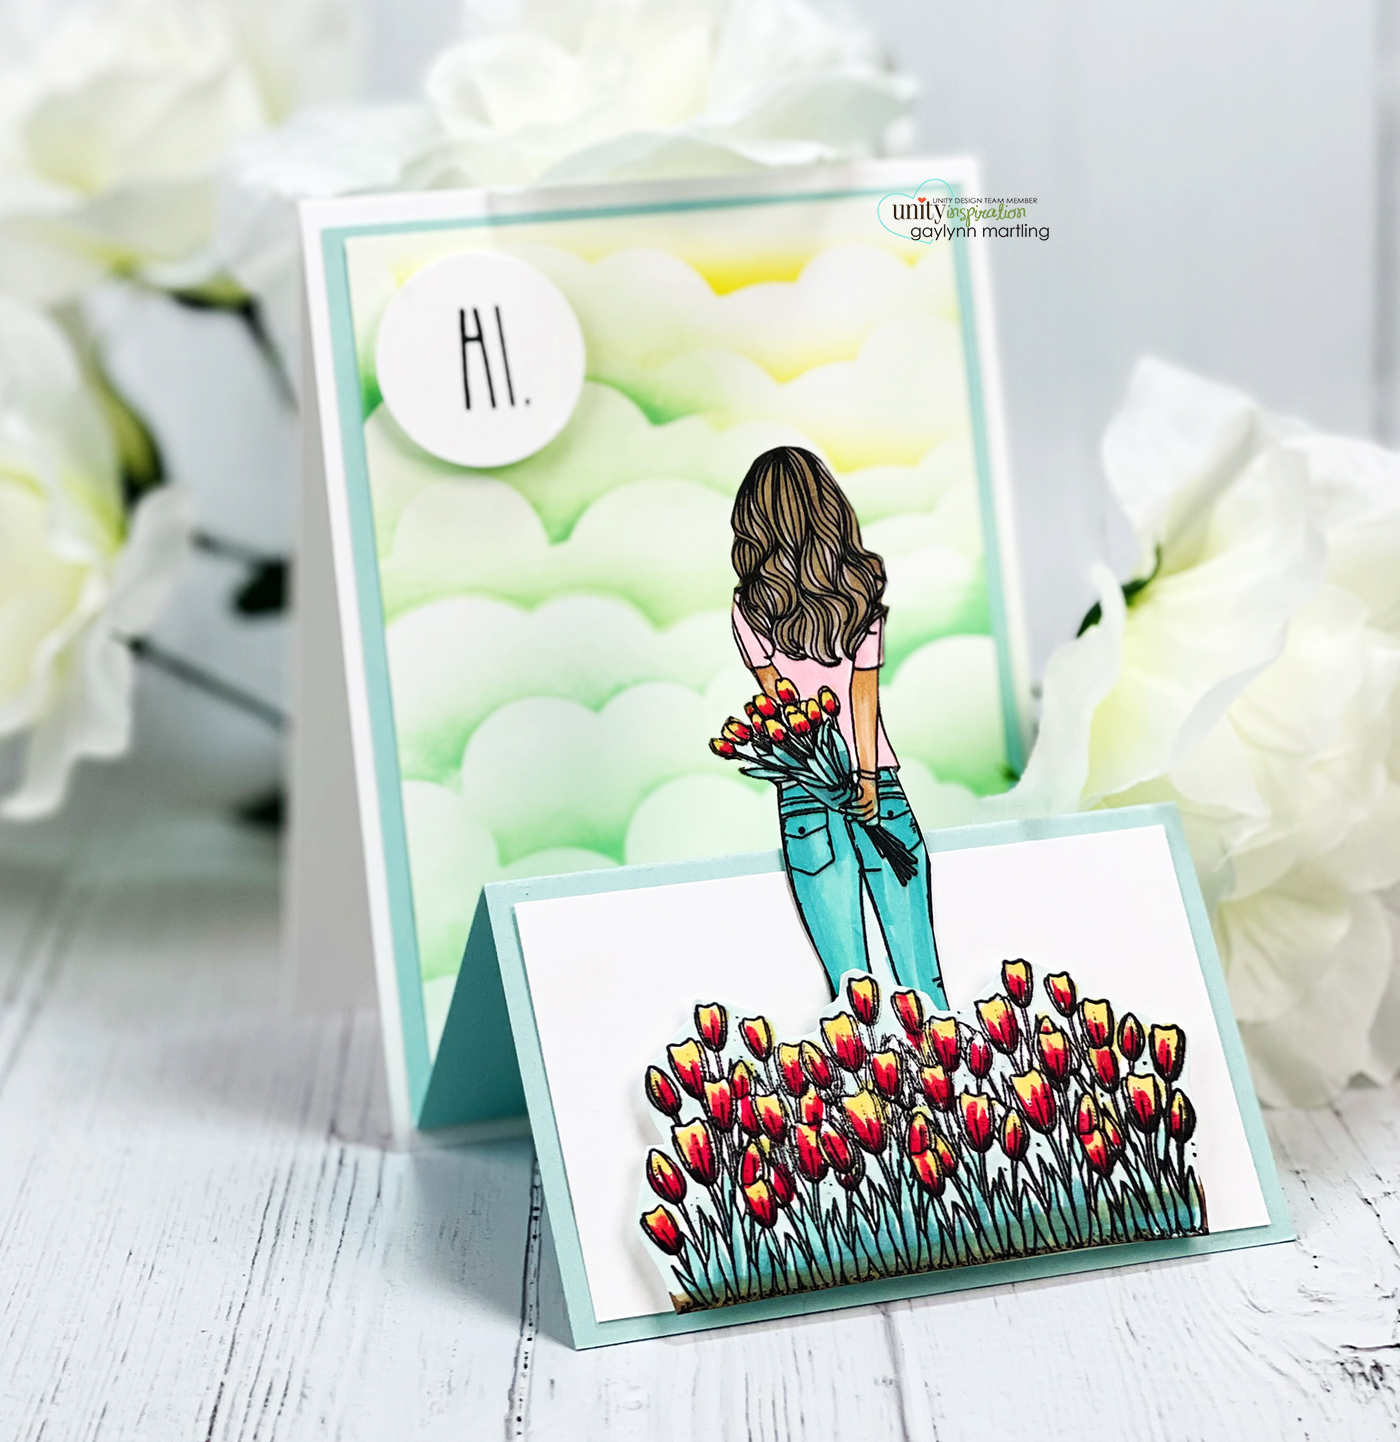
Sentiment: Hi.
Helpful tips:
Here are helpful tips for creating this easel card scene. To begin, stamp the girl, the flowers and the sentiment. Next, trim and score a card base and a mint color frame panel. Then, trim a cloud panel and a bottom trim. Also, add color to the girl and flowers and then fussy cut (cut out) the girl and the flowers. I used a circle punch for the sentiment. Next, add light ink blending in two colors onto the cloud panel using a cloud stencil. Finally, adhere the scored green panel onto the card base and add the accent layers to finish the easel card.
Card Base: Cut 11″ x 4 1/4″, score at 5 1/2″.
Mint Frame Panel: Cut 10 1/4″ x 4″, score at 5 1/2″ and 7 3/4″.
Cloud Panel: Cut 5″ x 3 3/4″.
White Front Strip: Cut 3 3/4″ x 2 1/4″.
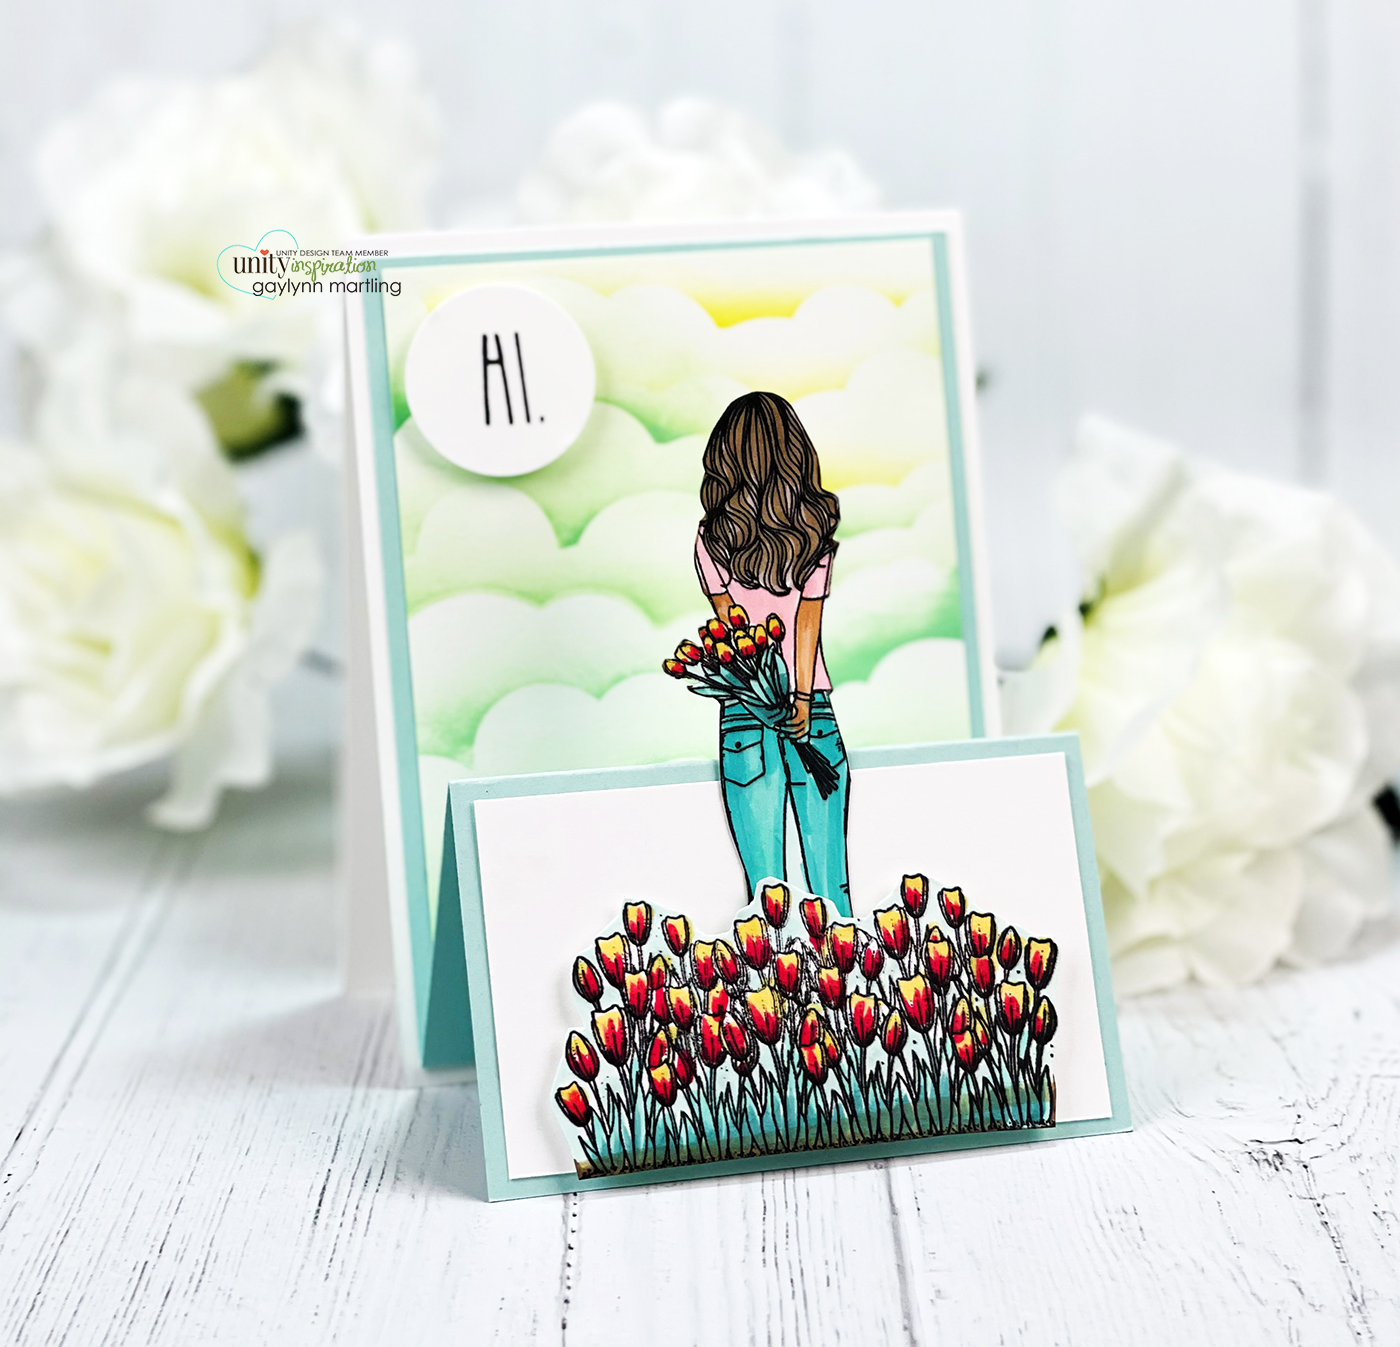 This is another look.
Here is my video tutorial for this project. It will detail the full process.
Supplies: Unity Stamp Co. Begin Anew, Gotta Love Sentiments, Cloud and Wave Stencil.
Also, foam and flat double-sided tape, cardstock, mini Misti, Simon Says Stamp intense black ink, distress oxide ink in cracked pistachio and fossilized amber; 1 1/4″ paper punch, MSC scoring board, Copic markers E44, E33, E71, E11, Y21, RV29, RV11, BG18, BG15, BG32, BG10.
Remember, if you want to view my other projects on the Unity blog, see my features linked below.
Technique Time
Watercolor Wednesday.
Please, tune in next Wednesday with a new project for Technique Time.
Thanks for visiting.