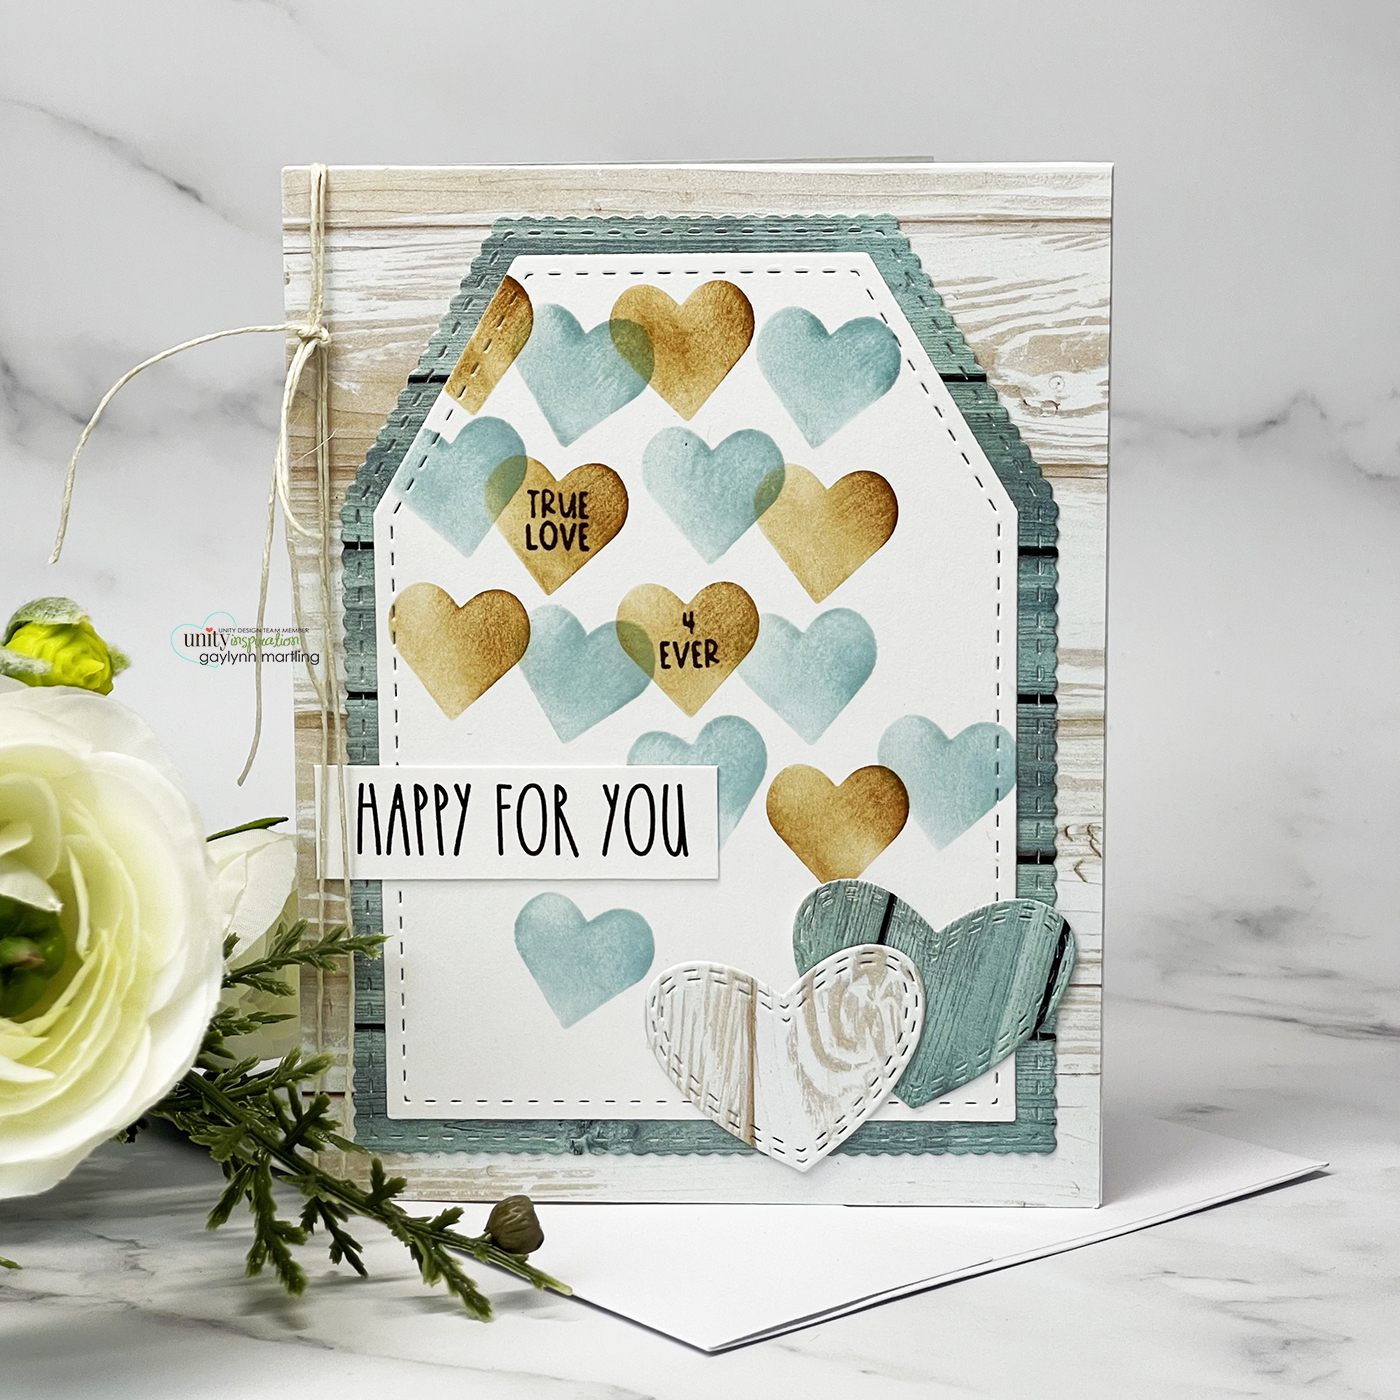
Hi there friends, Gaylynn here. For today, I am sharing two step stenciling with hearts. This was made using coordinating stamps and stencils with ink blending.
These chatty hearts can be used for more than Valentines. Here, I made a wedding card with a mix of stamping, ink blending and patterned paper.
 Sentiment:
True love 4 ever.
Happy for you.
Helpful tips:
Here are helpful tips for making this card using two step stenciling. To begin, prepare an A2 sized card base. Then, trim or die-cut coordinating patterned paper layers and frames. Also, die-cut bigger hearts using scraps from the patterned paper pieces. Next, onto white cardstock, stencil the #1 hearts using kraft color ink blending, making note of where you placed the first stencil. Then, using the #2 stencil, place it over the panel at the same place. Add ink blending for those hearts in a different color. Also, die-cut or trim the panel of blended hearts to fit the background pieces. Next, stamp the two small sentiments inside of two of the hearts and also stamp and trim the bigger sentiment. Finally, layer it all with glue, flat double-sided tape and cording, to finish.
Also, take a look at this card up close.
See how this card was created.
Supplies:
Unity Stamp Co.
Chatty Hearts {stamp & stencil duo}
Gotta Love Sentiments
Make A Tag {dies}
Stitched Up Hearts {die set}
Tuscan Textures {6X6 paper pack}
Rustic Wood {6×6 paper pack}
Additional supplies that I used for this project are noted in my affiliate links below:
Distress ink pad in speckled egg
Distress Oxide ink pad in vintage photo
Ink blending brushes
Removable sticky note tape
Cording
Heat tool
Flat double-sided tape ATG
Glue
Ink pad in black
Dye ink pad in vintage timber
Scoring board
Bone folder
Neenah 110 lb cover solar white card stock
Neenah 80 lb solar white card stock
Paper Trimmer
Desk craft & cutting mat
New Misti stamping tool
Die-cutting machine
Metal adapter plate
Craft Tweezers
Craft Scissors
Envelopes
Stamp & die storage that I use:
Magnetic sheets die storage
Clear pockets stamp & die storage
Clear Bags card storage
Technique Time and
Watercolor Wednesday.
Thank you for visiting and have a lovely day.
Gaylynn