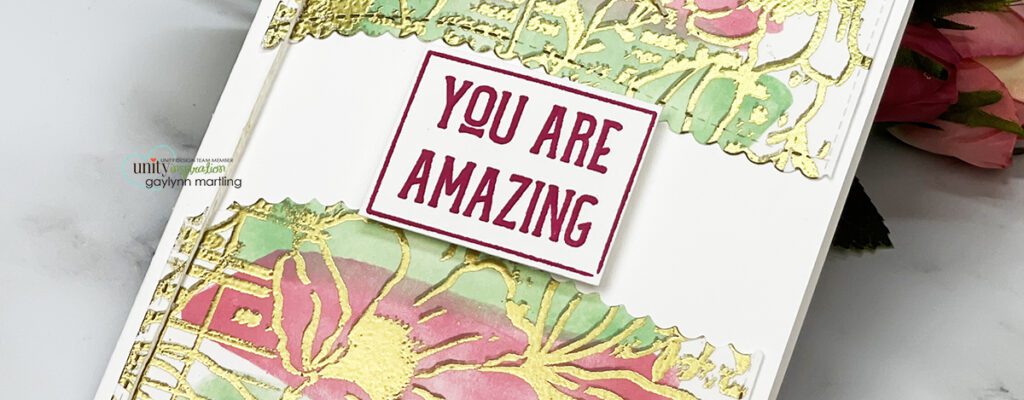
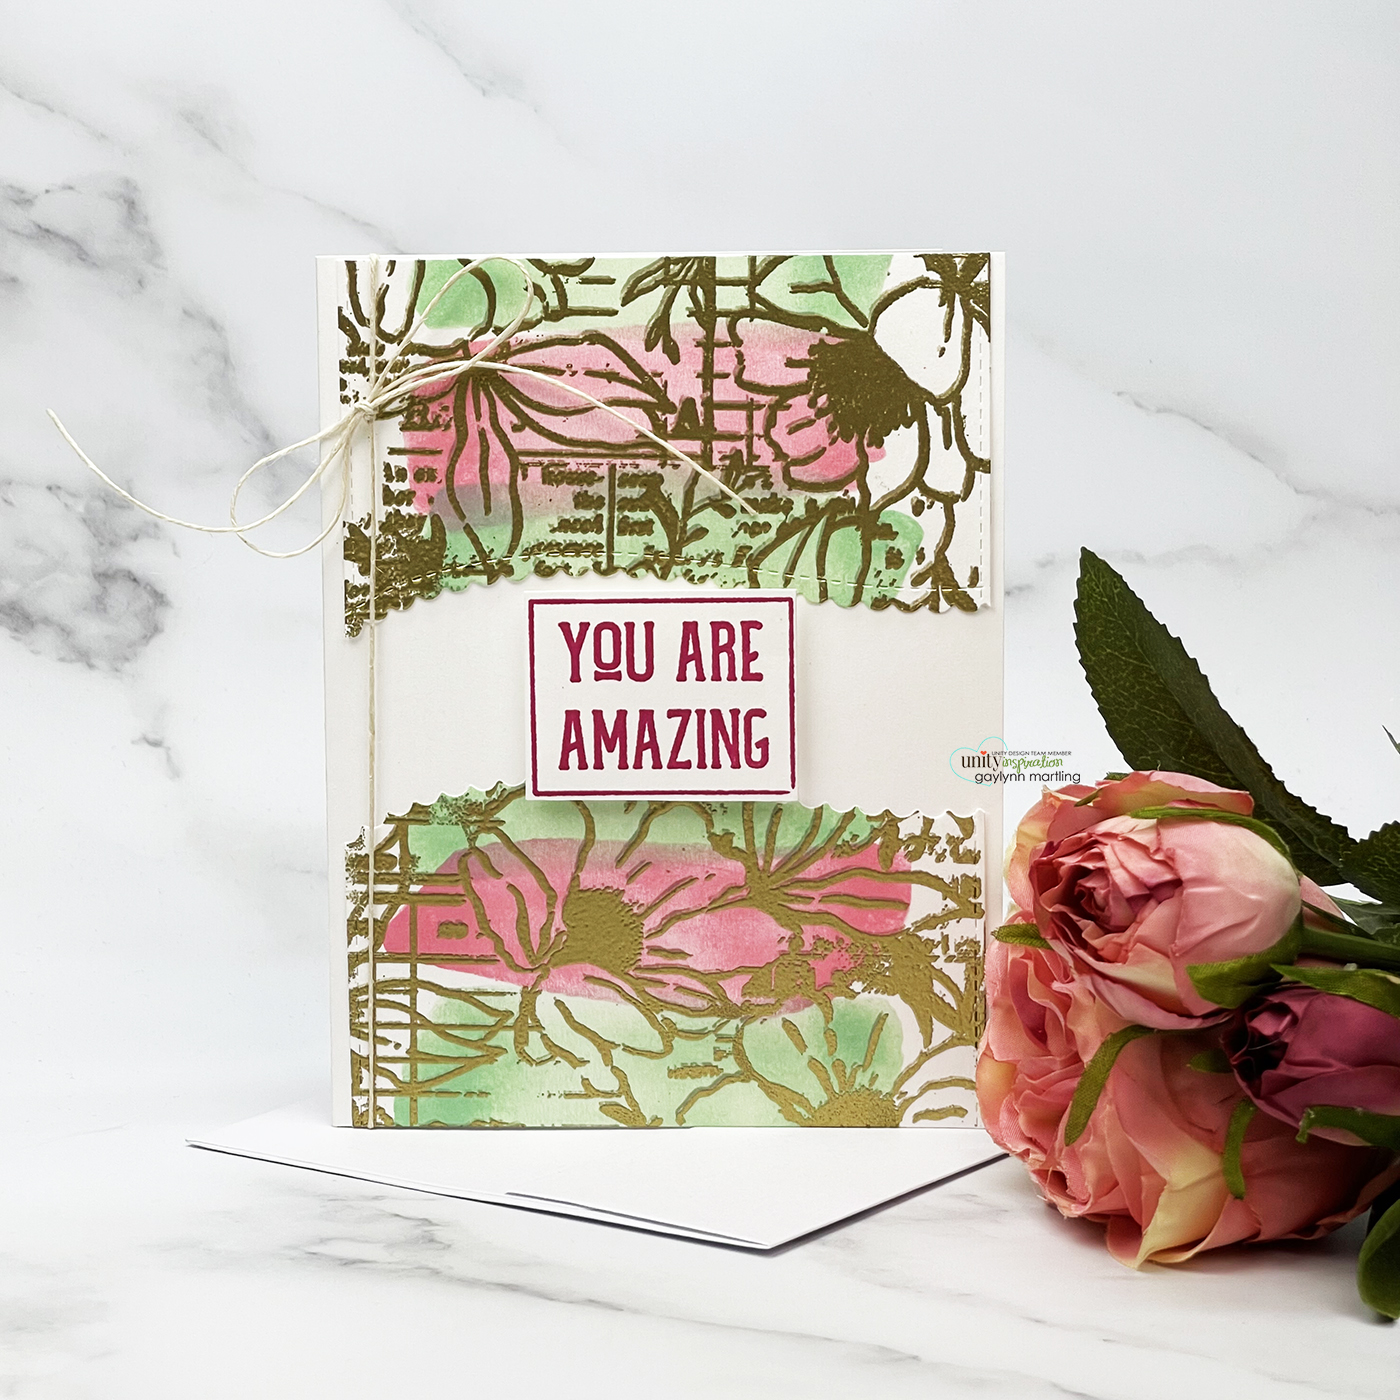
Hello, it’s Gaylynn. For today, I am sharing how to stamp, stencil then emboss this floral card. It was easy and fun to make.
I really love the combination of stamping, stenciling then embossing, especially with background stamps.
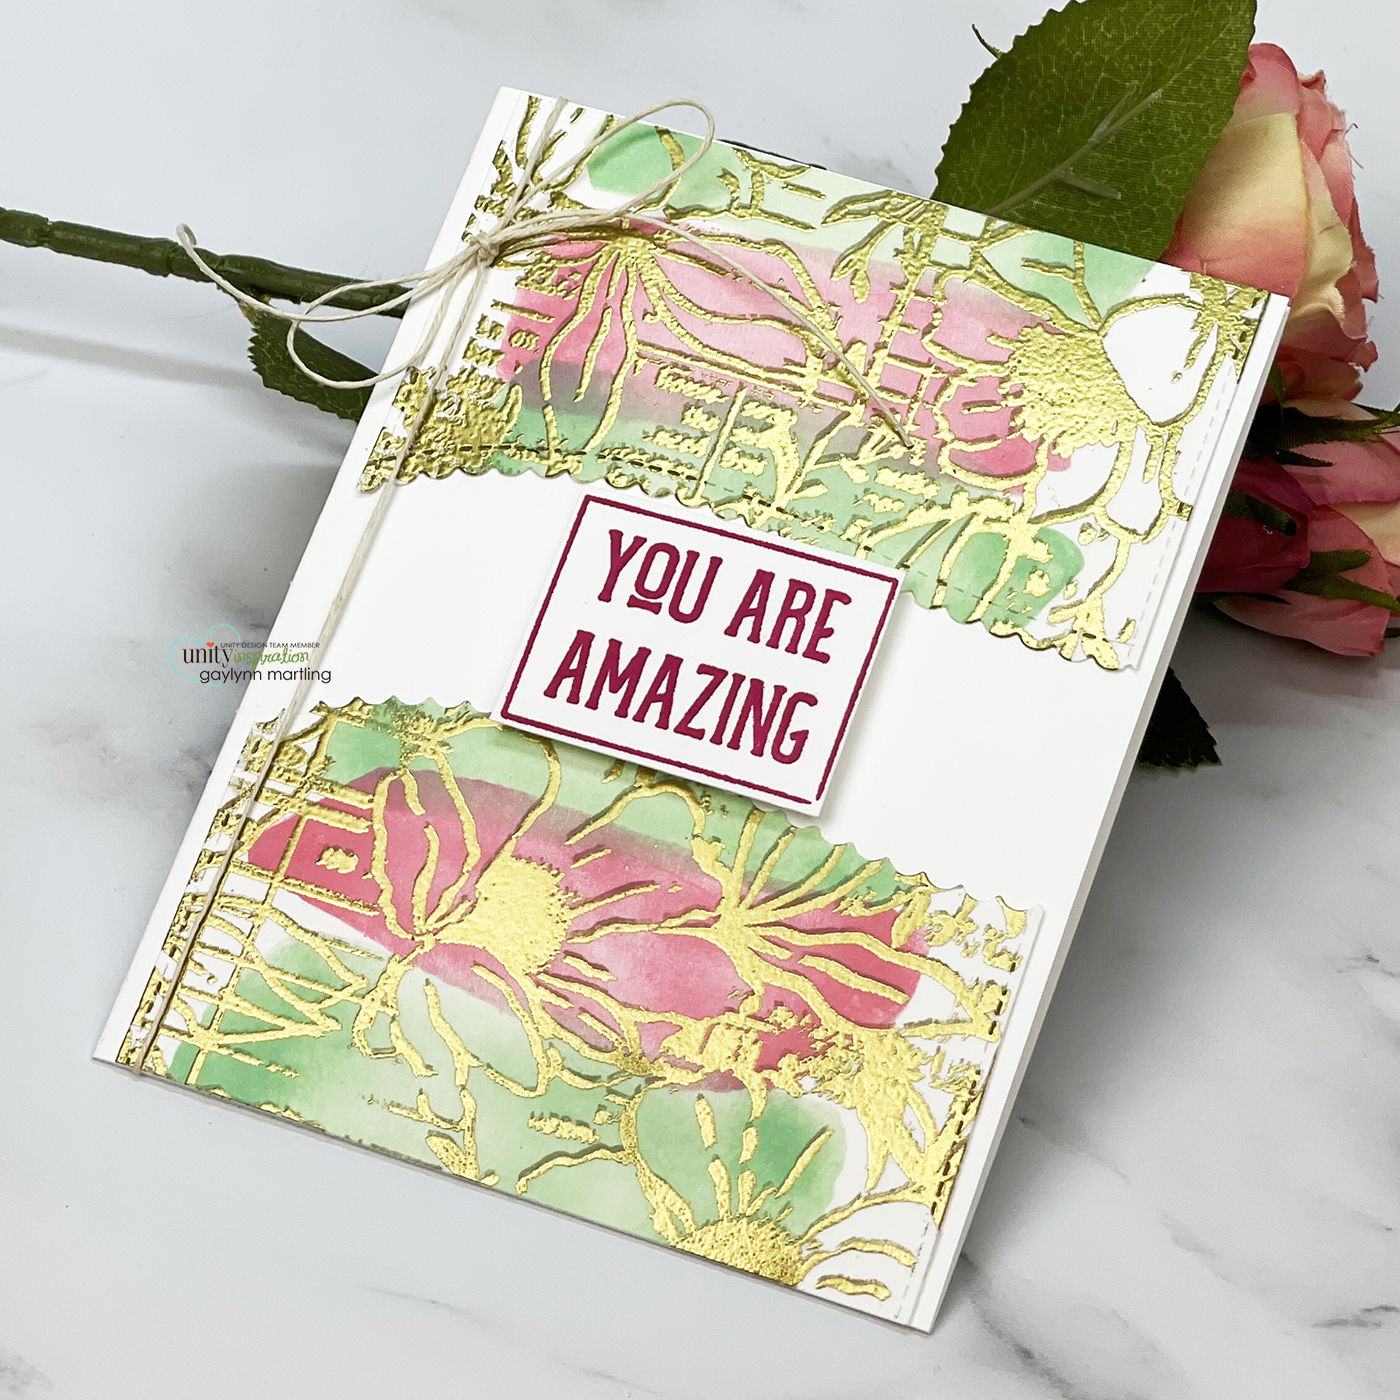
Sentiment:
You are amazing.
Helpful tips:
Here are helpful tips using the stamp, stencil then emboss steps. To begin, prepare an A2 sized card base in white. Then, using a stamp positioning tool like the Misti, stamp the background onto white cardstock using light ink like kraft color. Remember to keep the paper and the stamp in place. Next, dry the stamping and then add stenciling with ink blending over part of the background. I used the look of paint stroke patterns. Once dry, restamp in the same places using embossing ink like VersaMark and then heat emboss the background in gold. Also, stamp and trim a sentiment panel. Optional, die-cut or trim the center of the embossed panel to create a middle opening. Then, trim that panel to fit the card and the sentiment. Finally, layer it with flat and/or foam tape over the card base, to finish.
Another look at this card.
See how this card was created.
Supplies:
Unity Stamp Co.
Newsprint Floral Greetings
Additional supplies that I used for this project are noted in my affiliate links below:
Stencil paint strokes
Scalloped edge dies
A2 rectangle dies
Embossing ink pad Versamark
Distress Oxide ink pads in
cracked pistachio & worn lipstick
Copic markers E74 & E43
Embossing powder gold
Ink blending brushes
Removable tape
Cording
Heat tool
Flat double-sided tape ATG
Foam tape
Glue
Dye ink pad in
wild cherry and kraft
Scoring board
Bone folder
Neenah 110 lb cover solar white card stock
Neenah 80 lb solar white card stock
Paper Trimmer
Desk craft & cutting mat
Misti stamping tool
Misti sticky mat
Die-cutting machine
Metal adapter plate
Craft Tweezers
Craft Scissors
Envelopes
Stamp & die storage that I use:
Magnetic sheets die storage
Clear pockets stamp & die storage
Clear Bags card storage
Technique Time and
Watercolor Wednesday.
Thank you for visiting and have a lovely day.
Gaylynn