


Hi everyone! It’s Amber here from Forever Amber’s Art with a Tuesday technique that is tried and true!
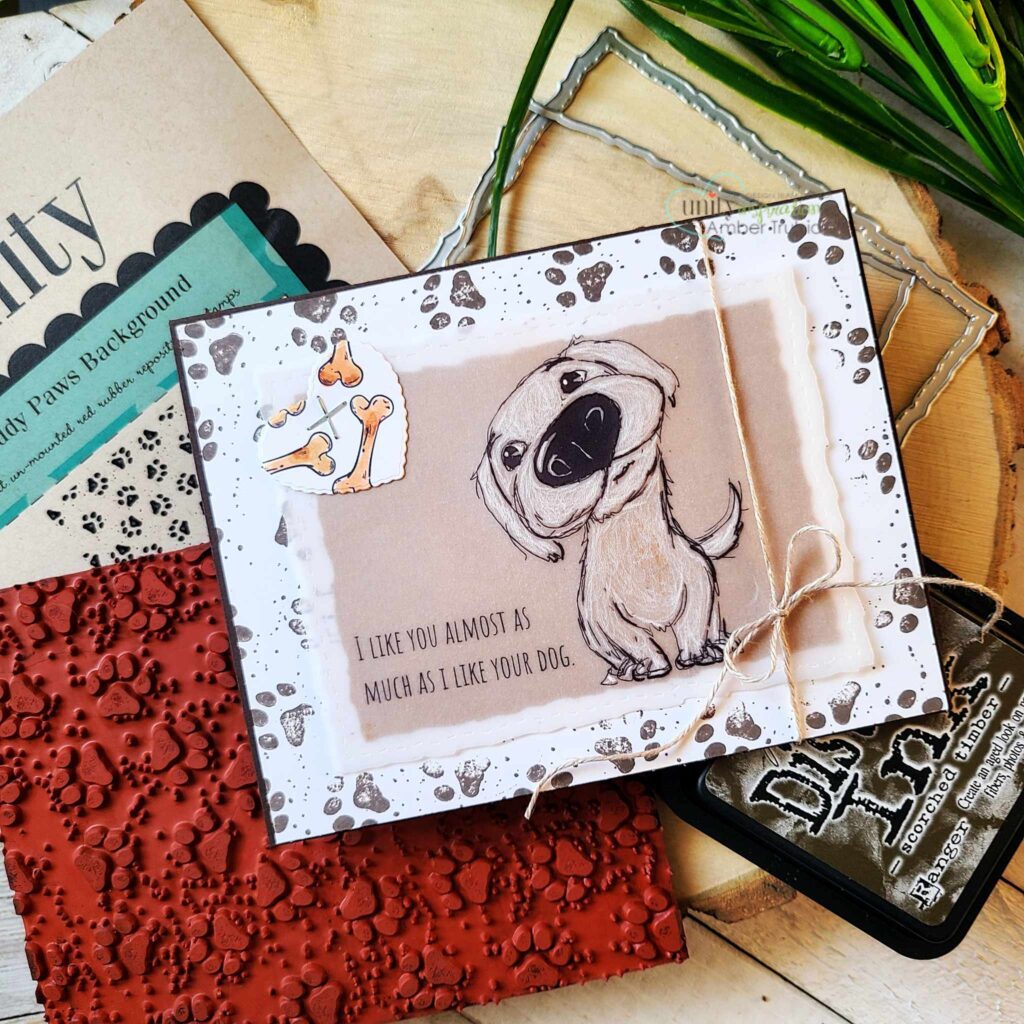
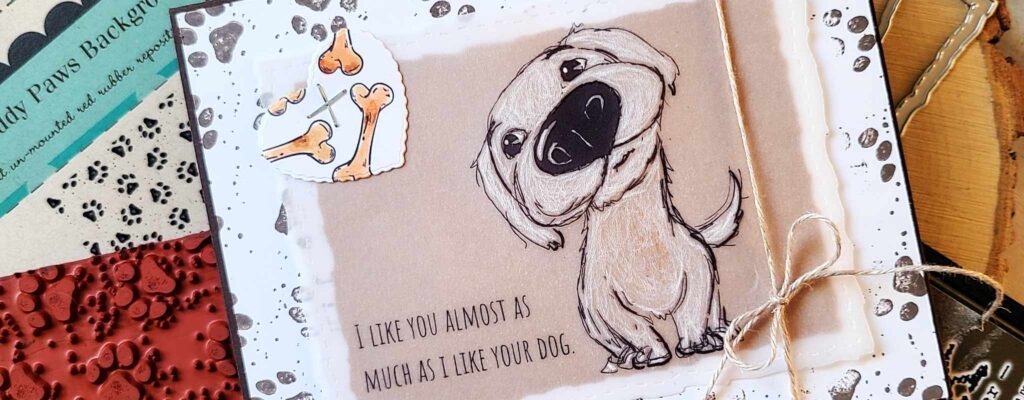
This past week we had some AMAZING new releases and we can’t stop inking up the adorable pet stamps that are hot off the red rubber presses 😉 I love them all – but I definitely am Team “Dog” and Boop the Snoot is a must-have.
I am always looking for fun NEW techniques to try, but I spotted a long forgotten technique that Heather Hoffman, a Unity Design Team Alumni used for a great beach scene card, and I knew I wanted to revisit it!
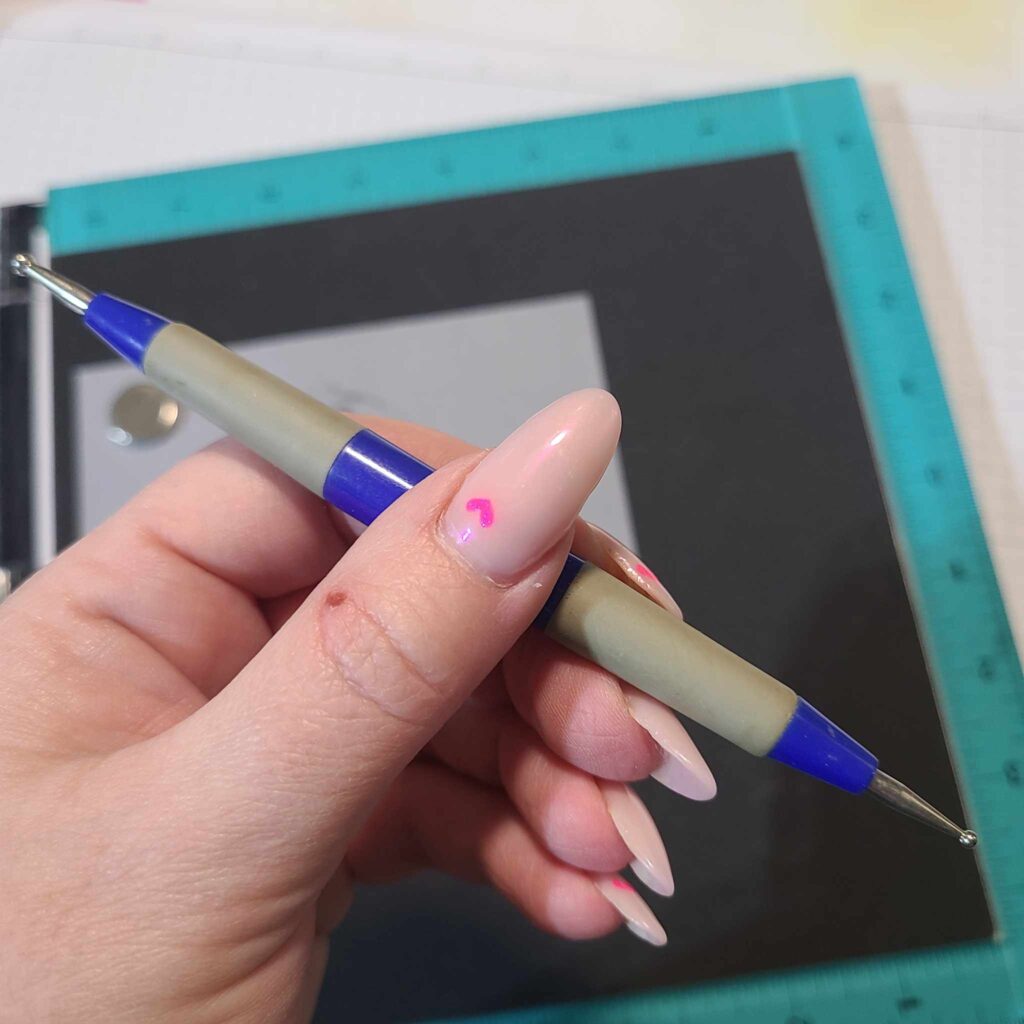
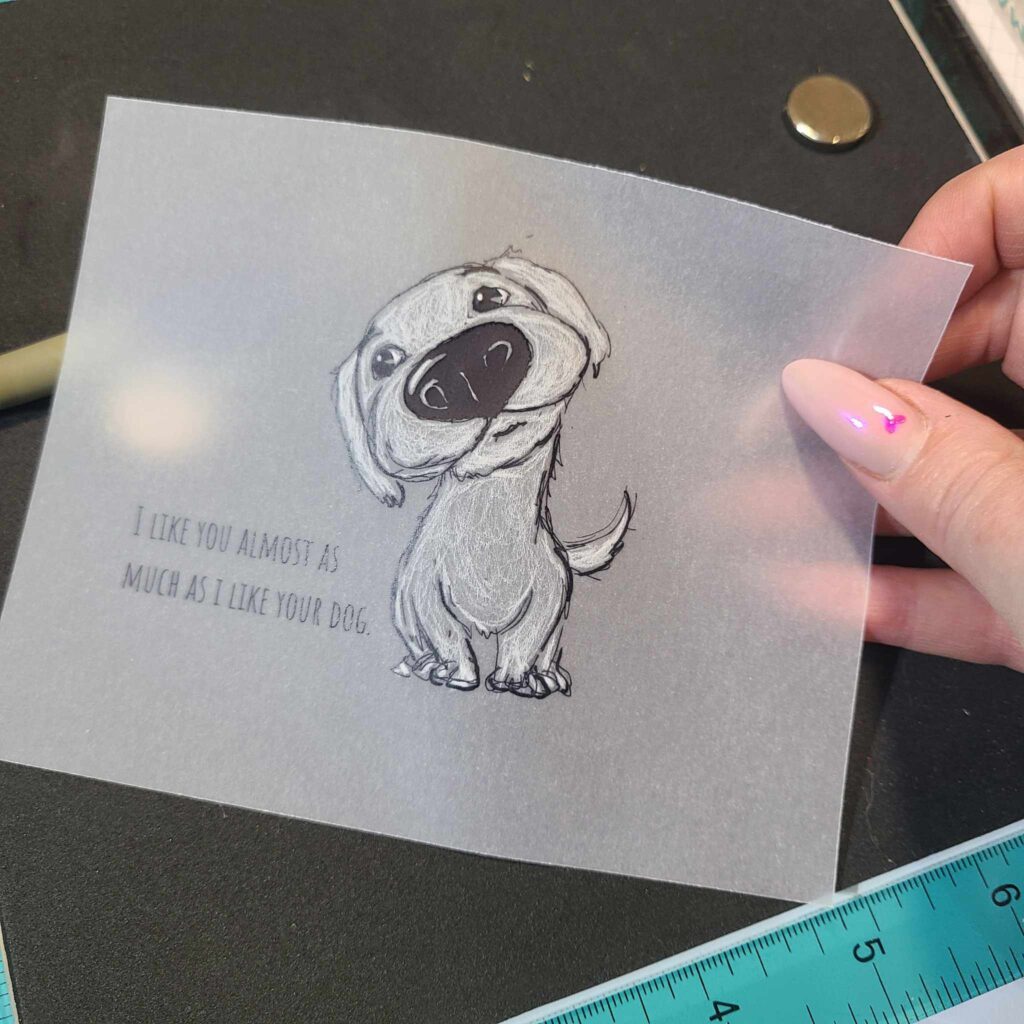
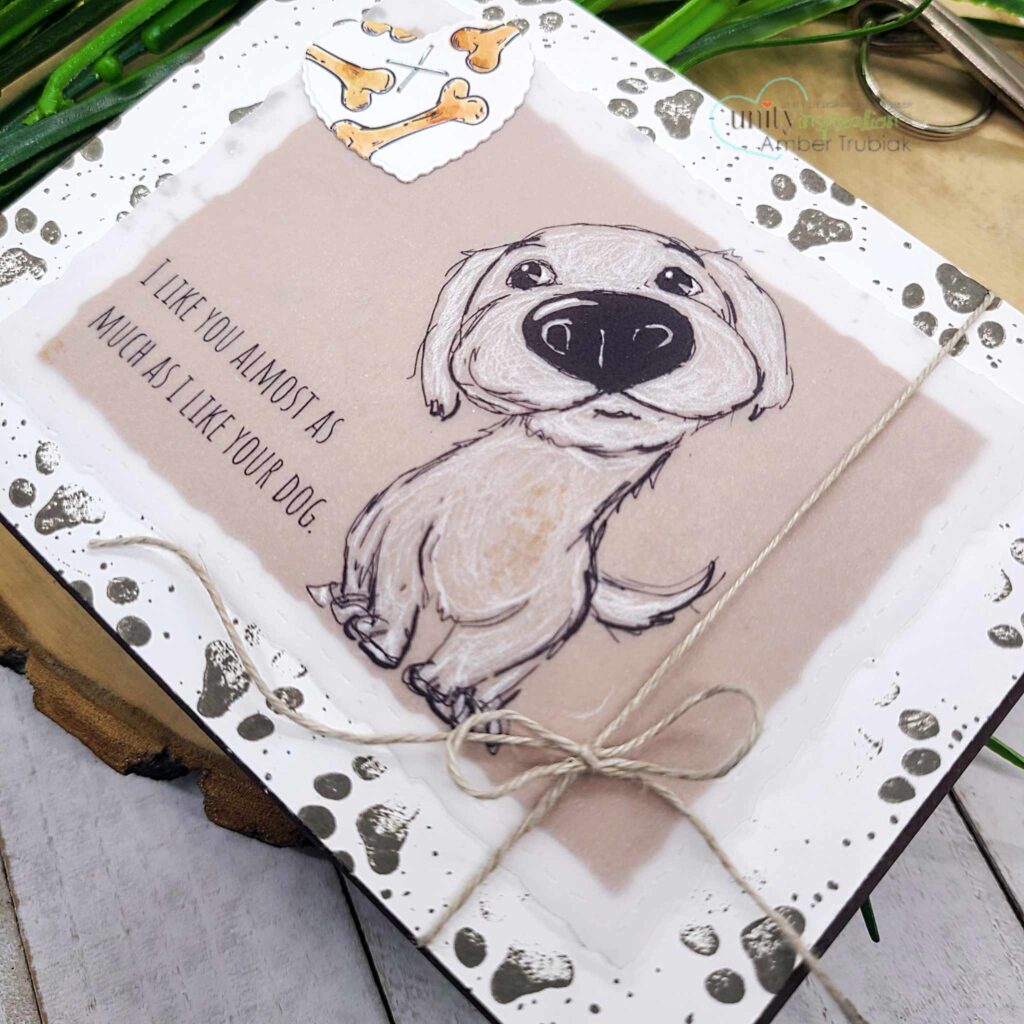
This fun image from Boop the Snoot is colored with a Stylus – when you use this little tool on vellum, it embosses it, adding fun texture and let’s you put your markers or pencil crayons away for another day.

An important hint about stamping on Vellum is using the correct ink – Vellum is notorious for having your ink “run” when you try to color…. so a reminder to use Stazon ink.
The stylus tool I used has 2 different sizes – I used the smaller end for the more detailed spots. I also found that by putting my vellum on the foam mat that is in my stamping platform it gave just enough “cushion” and I didn’t have to use alot of pressure (if you press too hard, you will poke a hole in that vellum layer!)
Once my Boop image layer was colorized using the Stylus, I decided to cut it to size with the Deckle and Stitches nesting dies.
I knew my plan was to use Unity’s background stamp called Muddy Paws instead of patterned paper. They work amazing together! I used the new Tim Holtz Distress ink in Scorched Timber and then added a panel of kraft cardstock so the vellum layer would POP!
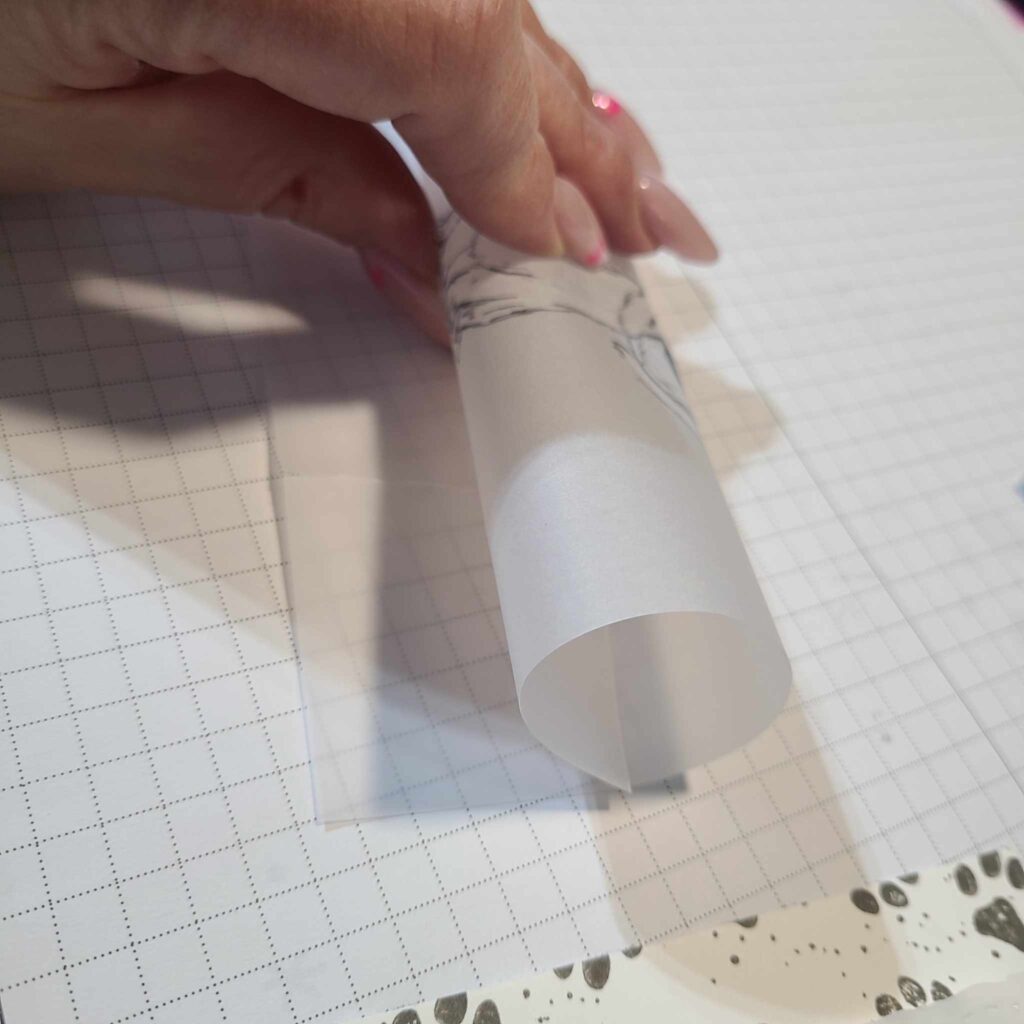
Before adding that vellum layer I needed to flatten it (as the Stylus tends to make it bend and warp a little.) It was as simple as rolling it up and bending it a bit.
Adhesive and vellum can sometimes be tricky to disguise. For this card it is cleverly hidden behind that cute pupper. I also inked up the small bone images and colored them with Copics before using one of the small Dashes and Frills heart dies. Stapling it made for an easy way to hold it all in place as well. 🙂
Once I added that sweet linen thread, everything was popped up and layered on a Ground Espresso cardstock base.
I love how this card turned out and Heather’s video was easy to follow and helpful the first time I tried this fun vellum technique! If you would like to check it out, head to the original Unity Blog post here.
Thanks so much for stopping by!
Peace, Love n’ Ink
Amber


