


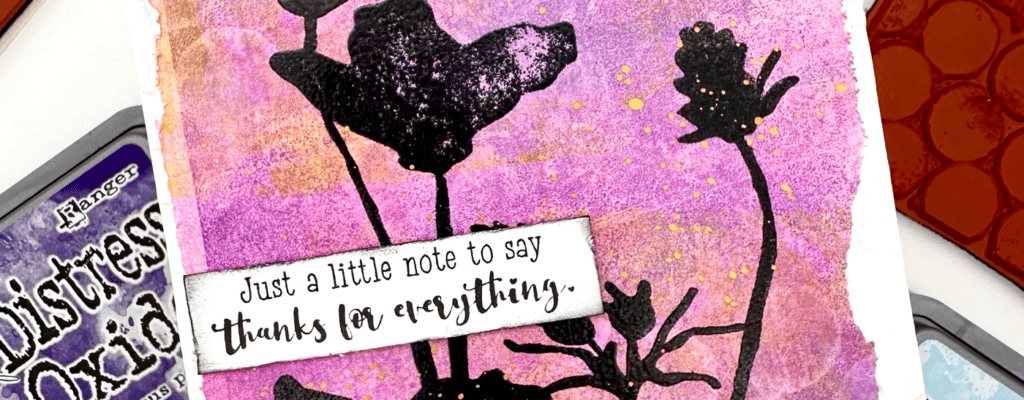
Hello Unity Friends, it is Natasha here back with some mixed media fun! Today I am sharing a card set using gelli printing with Distress Oxide Inks! Today’s card is using the beautiful Wild Poppy Silhouette set as my focal image! I am sharing 2 examples here, one with a green/blue tone and the other with pink/purple tones. So let’s get started!

I started by creating the backgrounds for my cards using Distress Oxide Inks on my gelli plate. I start by placing the ink directly to the gelli plate surface. I then use my brayer to move the color, as well as to remove some of the harsh lines from the ink pad. I add several colors at a time, being careful not to touch the new pad directly to another color to avoid the 2 colors touching. I then place my paper directly onto the gelli plate surface. I use my brayer to lightly go over the back of the print. You can also use your hand here. I remove the print, then continue to build layers of ink by adding more color and texture. I added texture to the gelli print with a piece of bubble wrap, a baby wipe, as well as the stamp set Plump Polka Dots. I lightly spritzed water on the polka dot background, then placed it on the gelli plate surface. The water picked up some of the color on the prints. Once I was happy with the print I set them aside.

**Between the inking and printing, I always remove the excess ink on a scrap piece of paper. I have this off to the side of my work surface. You can also use a piece of deli paper. I do keep these as well, as these create awesome layers and texture pieces for future projects.
Once the backgrounds were complete, I prepped each of my gelli print backgrounds with my embossing buddy. I then stamped the Wild Poppy Silhouette set using Versafine Clair Nocturne ink onto each panel. I then heat set the images using clear embossing powder. Next I distressed each of the panels by tearing the edges of each card panel. I wanted to try something different here to build more movement. Next I added splatters to each panel and set them aside to dry.

Next I dry embossed a white card stock panel using an embossing folder in my stash. I trimmed each panel to an A2 size card, then adhered them to a top folding card base. I added the gelli print onto each card. I completed the card sets with a sentiment from Silent Spring stamp set.
Thanks so much for stopping by today! I had a great time! I will be back soon with more crafty inspiration!
Natasha
.  .
. 
Unity Supply List


