


Hi friends! Do you like the grungy look on a card? Are you brave enough to tear up some beautiful, patterned paper, ink it up, all in order to achieve that grunge look? I admit, tearing beautiful paper is a bit scary to me, but when I look at the end result, I’m glad I did it! Today’s card is all about grunge! I’ll be using Still Turning Heads stamp, Bohemian Dreams paper, and Rustic Whispers paper pad.

You can use anything to get that grunge look, but I do love Unity’s line of patterned paper because I think the patterns truly help to achieve this look! To shop their line of patterned paper, click here.
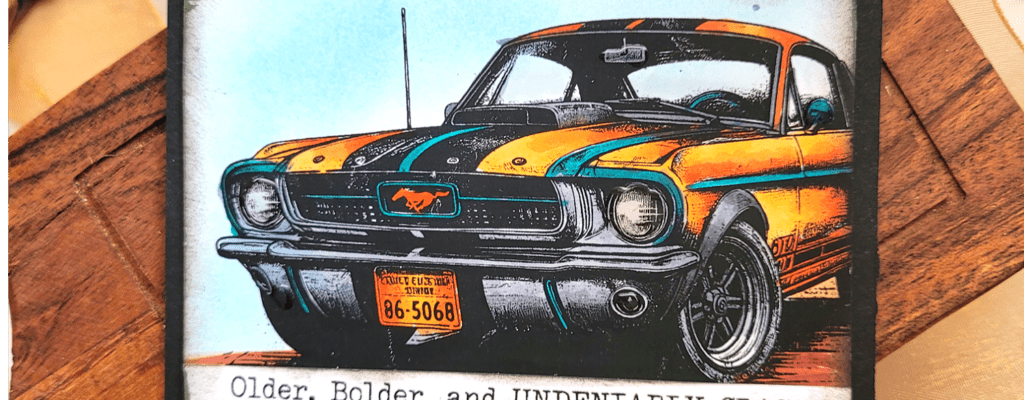
The car from Still Turning Heads stamp reminds me of one my older brother used to own, and it was an awesome car! So, I fell in love with this stamp set right away and knew it needed to be grungy!
I stamped the car onto a piece of white cardstock using permanent black ink. Then I chose 2 sheets of patterned paper from Bohemian Dreams and Rustic Whisper. Using the colors in the paper from Bohemian Dreams as inspiration, I colored the car with my Copic markers in shades of coral and teal. I added a shade of blue ink over the car to represent the sky, and brown marker beneath the car for the dirt road.

Now comes the grunge part! Once the coloring was done, I tore the paper above and below the car with my hands, creating jagged edges. Then I inked the edges with black ink., which helped to frame the car and help the jagged edges to pop. Next, I grabbed the sheet of patterned paper from Rustic Whispers (the one with the lines on it) and tore the top and bottom of it, just as I had done previously, only this piece was slightly larger than the panel with the car. I inked up the jagged edges of this piece as well and then adhered the panel with the car over it so the pattern from the paper was peeking out from behind the car. Now I have 2 layers of grunge, but I wanted to keep building on it!
Next step was to trim down the piece of paper from Bohemian Dreams, ink up the edges, and then adhere the other 2 layers over it and inked up all 4 sides with black ink. I added olive green paste over the edges for shine and texture. You could also tear the edges of the 3rd piece of paper if you want! The key is to ink up those jagged edges so they pop and have that grunge look!
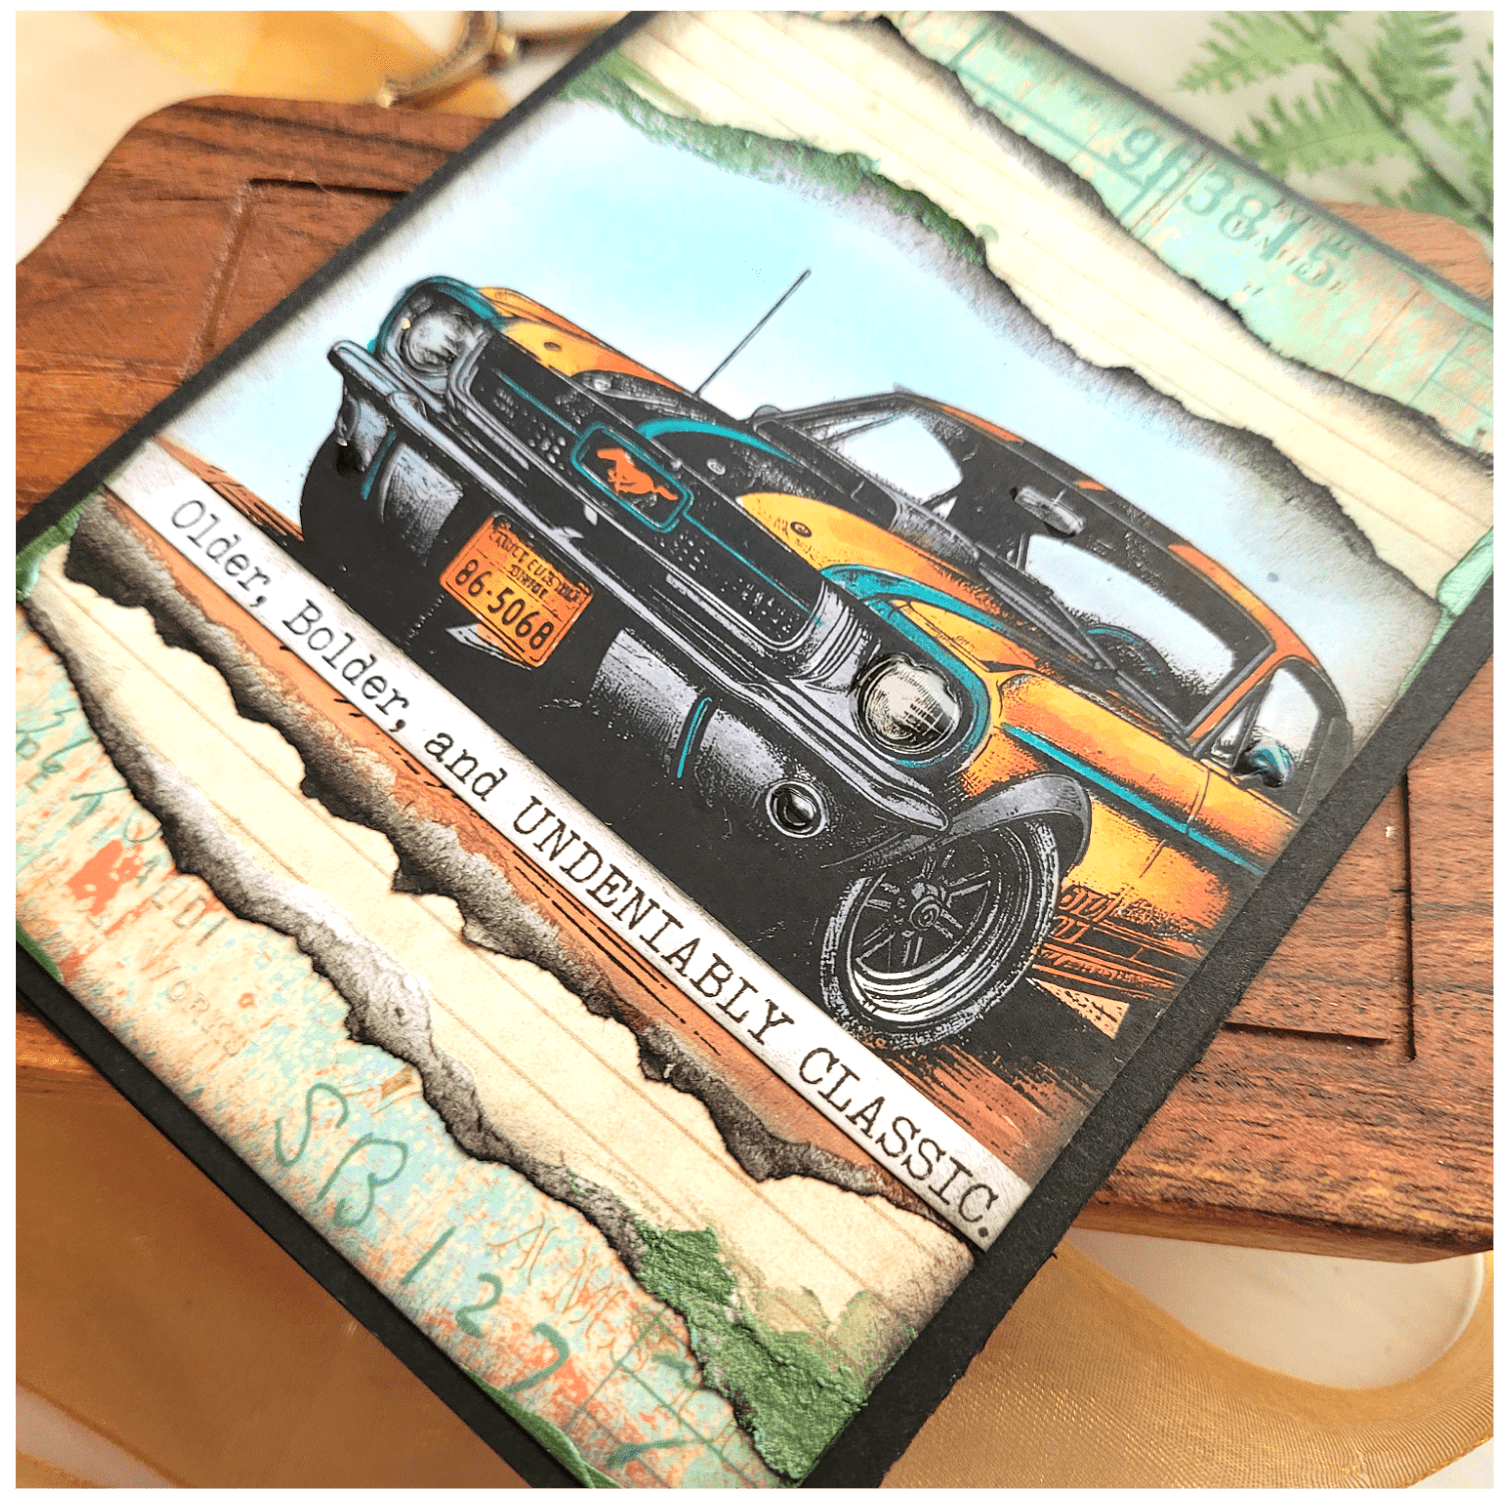
. I adhered all 3 layers over a black card base sized 5.5×4.25. Then I finished with a sentiment from the stamp set, which I also inked up in b lack ink, as well as Glossy Accents over the headlights of the car.
Creating a grunge look is very easy if you allow yourself to get playful! Thanks for stopping by! If you want to shop for the items used in this post, click on the description to be linked to the Unity Stamp Co. store!
