Hi everyone! Whit here with my very first blog post… ever. hehe. I’ll be up on the blog one Saturday a month featuring crafty things I love, tutorials, and randomness. So hope you’ll tune in again!

I am pretty obsessed with learning how things are created and so I thought- why not show you all how our stamps are made here at Unity.
As you might know, we are cook to order. Each and every stamp that you order starts from raw materials and is cooked, cut, and packed up by hand in our little small town Minnesota operation just for you. And I am here to show you exactly how it is made step-by-step.
Let’s get started making some rubber stamp goodness, shall we?
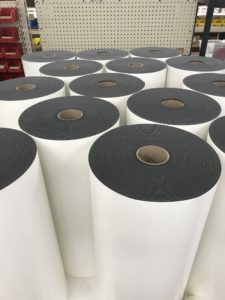
Did you know that we have huge pallets of raw red rubber delivered to Unity every single month?

That is how stamps start out. Each roll is about 50 pounds and is hand cut down into sheets that are 8.5 x 11 inches.
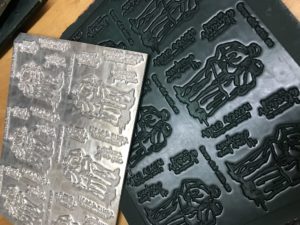
Every stamp starts out as an image on a magnesium plate– we then make a matrix board mold to ‘cook’ the stamped images by placing the magnesium plate face down on a matrix board and cooking it under pressure in our ovens. Here is one hot out of the ovens!
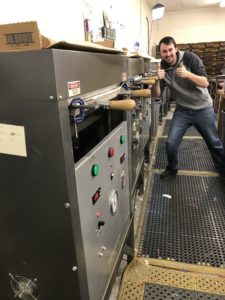
Speaking of ovens… Here are ours! We have 6 ovens going 8-12 hours per day!
They heat up to about 350 degrees and the stamps are put under extreme pressure so the rubber is pressed and cooked to perfection. This is how that deep etch you know and love about Unity is created. It’s all about that pressure and perfect heat combo!
The stamps are cooked for about 10 minutes
(fun fact: the time and temperature that stamps are cooked at changes seasonally! When its really hot or really cold we adjust accordingly. How is that for being precise?)
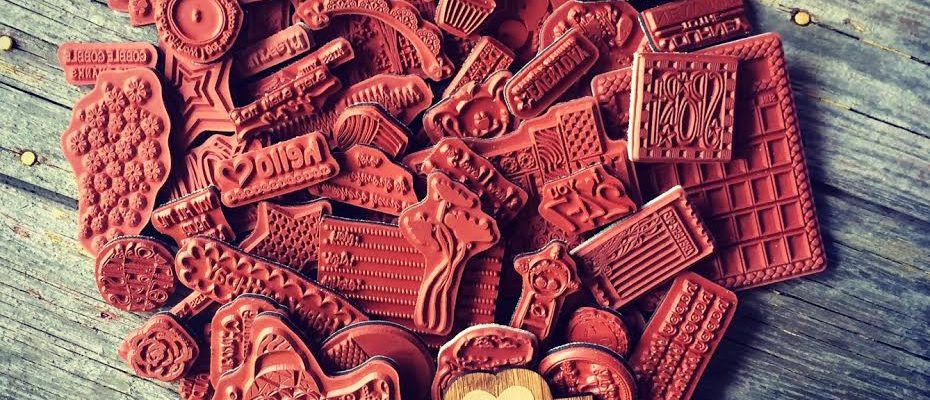
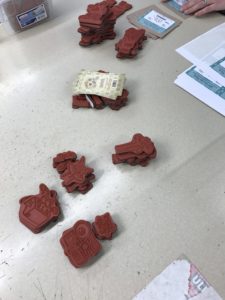
Once the stamps have been in the oven for about 10 minutes we slide them out and pull off the top coating of wax paper– this is so the rubber doesn’t get stuck inside of the oven as it melts! From there we simply peel the cooked rubber off of the matrix boards and LOOK– a perfectly cooked red rubber image.
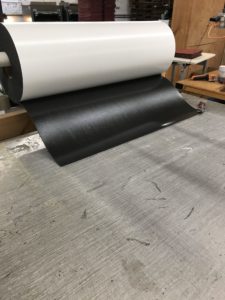
Each month we also get in huge shipments of sticky back cling foam. They come on giant rolls that are about 40 pounds each.
Here is a peek at our foaming table– we have these neat little things the foam roll slides on to to make it easy to roll out and stick down several sheets of that red rubber goodness at one time.
We then carefully cut around each of the sheets and from there it goes to our CNC machine. You guys– this thing is magical. Here is a little video to show what this baby does:
Ever wonder HOW your UNITY stamps are cut so PERFECTLY each and every time?? WATCH this! It's like MAGIC! P.S. This is one of our BEST selling kits THIS week! Get YOUR hands on it.. It's stinkin' cute! {and on SALE}https://www.unitystampco.com/shop/just-stinkin-cute/
Posted by Unity Stamp Company on Friday, April 8, 2016
Nic is our CNC extrodinaire– he perfectly traces around each of those images to get a close, perfect cut programmed into this machine each and every time. Once they are cut, the images just pop right out and its on to packing them up!
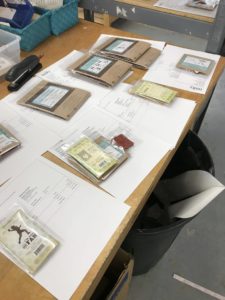
Each kit has special packaging– we stick the according label on the packaging and everything is packed up by hand. Not sure about you– but I love that each stamp is created with such care, attention, and detail by us here at Unity!
Once those stamps are packed up– it’s ready to head out in orders. WOOT– could that be your stamp we just cooked and packed up? Better go check the mail just in case 😉
Anywho- I hope you loved seeing how stamps are made! All of us at Unity take such pride in creating each stamp just for you and want to thank you for all of your support of our little company! It really does mean the world to me that each day I can live out my dream because of YOU.
XOXO-