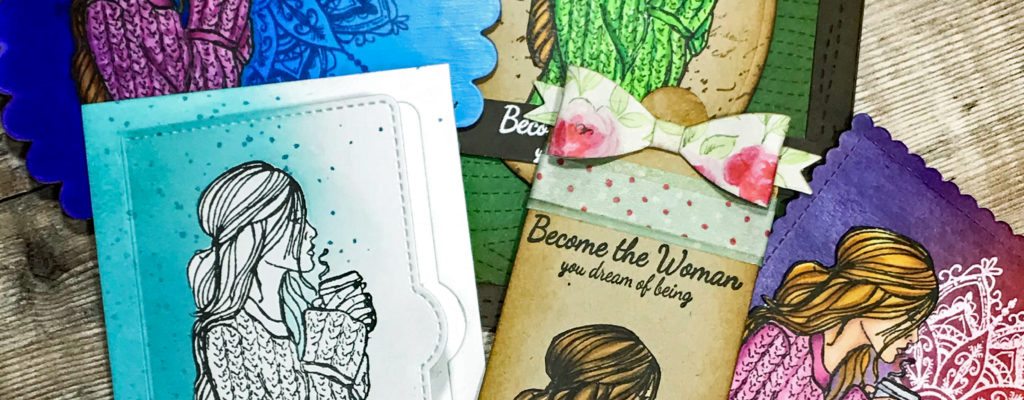
Good morning crafty friends. Echo here with another stamping therapy session to fill your crafty soul. Today I have a video tutorial on how to make chipboard coasters. Also have samples of how to use one stamp in different ways. These chipboard coasters are fun to make and make great little handmade gifts. You can use all kinds of different stamped images. I thought it would be fun to do a project that was not card related. Primarily, I am a card maker but, it is fun to mix it up a bit. Challenge excepted! Here is the look at the chipboard coasters and video tutorial.
Kits used: Dream of being and Bohemian backgrounds
Chipboard coasters
First project
These coasters probably aren’t indestructible but they hold up well considering they are made from paper. You do need to use a steel rule die for this technique. Thin steel dies will now cut through chipboard. If you don’t have a steel rule die. You could always cut squares and make a chipboard coaster that way. I love this scallop shape so much and my steel rule dies get a bit neglected since the thin steel dies have came out. Back in the day that is all they made was the big steel rule dies. They are great for cutting thicker materials for projects that require more then paper.
One stamp used in different ways
One of my favorite things is to see how many different ways I can use one stamp. I have been doing it for years. So, to mix it up a bit I did some not card related projects with this one stamp kit. Dream of being. The first one was the coasters.
Gift card holder
Here is a look at the second project.
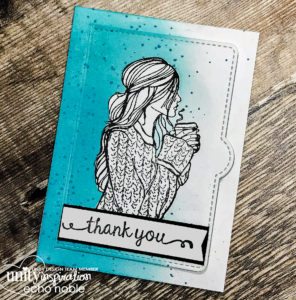
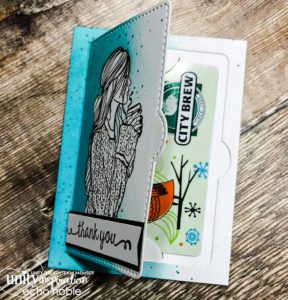
This is a gift card holder. Perfect for slipping inside a card or just giving by itself. I used die sets from Lawn Fawn. Lift the flap and simple gift card slots dies. I kept this one simple. I stamped image and then masked girl. Ink blended from the one side in distress oxide broken china. Blending to other side going lighter as I go. For a ombre effect. Then ink splattered in oxide faded jeans. Removed mask and added sentiment. The sentiment came from November 2016- sentiment kit. I want you to know. I love this gift card holder and the stamp makes it perfect.
Fridge magnet
Here is a look at the third project.
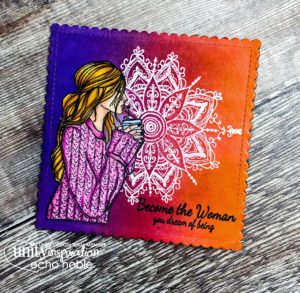
This I made into a fridge magnet. Yes, even though I am a full grown adult I still like to put my art on the fridge…lol. I made this one similar to how I made the coasters. I used distress inks and a rubber brayer. Just like in the video. I ink smooshed color onto craft mat and picked up ink with brayer and added to project. Distress inks used are wilted violet, festive berries, and carved pumpkin. I embossed the bohemian background with white embossing powder. I love how the white pops against the bright background. Stamped sentiment. I did use one coat of Mod Podge. Just because it is a magnet for the fridge. It is hard to tell in the photo but the girl is fussy cut and adhered to background with foam tape. I wanted to add some dimension to it. Glued it to chipboard and added magnet to back. Sticky back magnets that you can cut to any shape work great for this.
Book mark
Here is the fourth project.
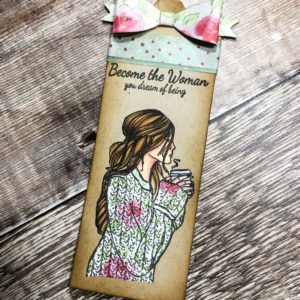
I made this as a book mark. You could use it as a tag as well. I stamped and colored her hair and skin. Then I paper pieced her sweater. Amanda has a great post on paper piecing. Click here to check that out. Then glued her to a strip of kraft card stock. I punch the top with a tag topper punch from Stampin up. Distress the edges in vintage photo. Stamped sentiment and added washi tape. For the top that would peek out of the book. I die cut a bow out of the same patterned paper I used to paper piece her sweater. The die I used is from Lawn Fawn as well called put a bow on it.
Card
Finally project is a card.
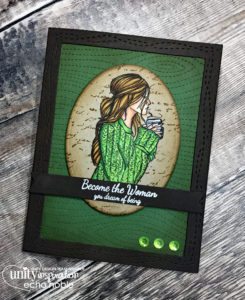
Of coarse I had to make at least one card. I have been inspired by the green and sparkle challenge that Unity is having over on the Show and Tell Facebook page. The challenges are so much fun. Go join along the Unity fun. I don’t know why I don’t use green very often but this definitely pushed me out of my comfort zone. Stamped a colored girl with Copic markers. Fussy cut her out. I die cut an oval from kraft card stock and stamped the script for Hug kit in vintage photo and distressed the edges as well. Die cut background in green card stock using the Lawn Fawn die stitched woodgrain added the die cut frame border. Embossed sentiment with white embossing powder and cut into a banner. Added green embellishments.
Hope you enjoyed todays stamping session on 5 ways to use 1 stamp. It is fun to do projects that are not always card related. It can be chipboard coasters or fridge magnets. So much you can do with Unity stamps. I get stuck in my comfort zone and need to shake thing up a bit. If you try any of these projects out. Post them over on the Unity Show and Tell Facebook page. I love seeing everyone’s projects over there. That’s out time for today.
Until next time, stamp on!