Welcome back Unity lovers! Echo here with coloring tips with kraft card stock: Adding shadows and highlights. I have a video tutorial on how I add shadows to help pop a white colored image on kraft card stock using Prismacolor colored pencils. Here is the card I made in the video. I use Neenah environment desert storm 100 lb card stock. It is a beautiful kraft color. I used Lucky Little Ducks kit and Bunny- Keep You Forever sentiment kit.
Coloring with kraft card stock: Adding highlights and shadows
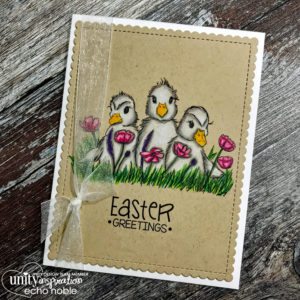
Here is the same image and sentiment stamped onto kraft card stock.
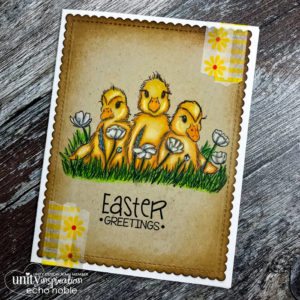
For this card I thought I would mix it up a bit and color the ducks in yellow instead of white. I distressed the edges with vintage photo and added some washi tape because I thought it could use a bit more yellow. Colors used: orange- PC918, yellowed orange- PC1002, sand PC940, 30% warm grey- PC150, 10% warm grey- PC1050, 50% french grey- PC1072, white PC938, olive green- PC911, grass green- PC909, and spring green- PC913.
Coloring tip: Shadows
Shadows really help add to any colored image. When coloring an image white on kraft card stock. Placing shadow colors is key to help pop the white. It also adds depth to the image. I do want to add that I do not consider myself an expert colorist. Just a crafter that enjoys coloring. I place shadows where I think they might be. I am not always right. It is a whole art learning how to place shadows and where the light source is coming from. You can take online coloring classes and read books to help learn this skill. I have enjoyed coloring as long as I can remember and I learn something new every time I sit and color. You don’t need to be an expert in light source to start learning how to add shadows to your coloring.

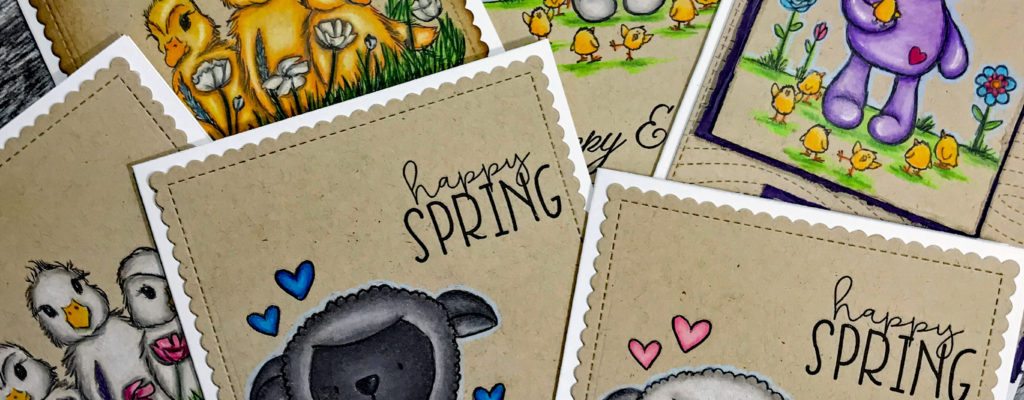
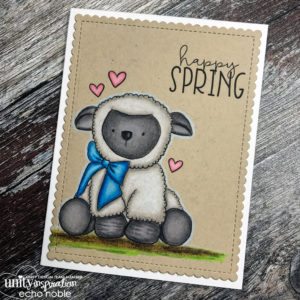
For this card I did the same as the ducks in the video. I colored my shadow color in first and blended out my colors to the lightest. My first shadow color is 50% french grey, then 20% french grey, then 10% french grey, and then finally add white. The stamps used for this card are Good Days kit and Bunny- Keep You Forever sentiment kit. The die is from My Favorite things- Wonky stitched die. Colors used: 50% french grey- PC1072, 20% french grey- PC1069, 10% french grey- PC1068, white- PC938, olive green- PC911, spring green- PC913, yellowed orange- PC1002, sand- PC940, orange- PC918, sky light blue- PC1086, violet- PC932, parma violet- PC1008, and raspberry- PC1030.
Coloring tip: Highlights
Same as shadows. Highlights can really help make a colored image come to life. When putting in highlights with colored pencils you can always leave room to add a highlight as your coloring or go back in with white gel pen to add your highlights. The gel pen will go right over the colored pencils. The same as the shadows adding in highlights all depends are where the light source is coming from. Again I am not an expert colorist and truly do learn as I go. I look at a lot of pictures to help learn where to add the shadow and highlights. That can be helpful as well.

Oh, purple bunny. I couldn’t resist making a bunny purple. You can see where I popped in those highlights on the bunny to add that little bit extra to my coloring. I started with my darkest color for my shadows working my way to the lightest color. Blending each color as I go. The background die is from Lawn Fawn- stitched woodgrain. Colors used: violet- PC932, parma violet- PC1008, greyed lavender- PC1026, 10% french grey- PC1068, white- PC938, yellowed orange- PC1002, sand- PC940, orange- PC918, sky light blue- PC1086, non photo blue- PC919, Rose- PC929, blush pink- PC928, magenta- PC930, olive green- PC911, and spring green- PC913.
Challenge yourself
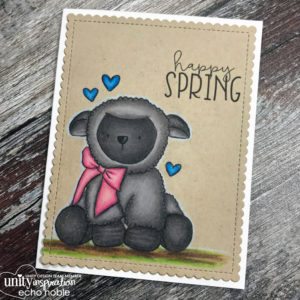
While I was in the coloring mood I thought I would practice on my shadows and color up these cuties. The stamps are from My Little Lamb sentiment kit. After I colored up the white one, I thought, I wonder if I can do a black one? Challenge excepted and away I went. I do have to say about half way through I almost scrapped it. I am so glad I didn’t. It was a great coloring exercise. The lesson I learned in this coloring adventure was don’t judge it until it’s finished! Do you challenge yourself in your crafting adventures?
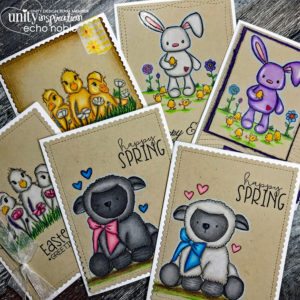
I hope you enjoyed our stamping therapy session on coloring tips and coloring with kraft card stock. I love using colored pencils on kraft. Especially anything white. Love white and kraft together. One could say that I am obsessed with it. If you missed last weeks post from me you can check that out here. I make five different projects using one main stamp kit. That’s our time for today!
Until next time, stamp on!